Return to All Blogs

Software Development Workflow: A Complete Guide

Discover the best software development workflows for 2025. Streamline your team's process and boost productivity.

Sep 20, 2025

0 mins read
Software-development-workflow

A well-structured software development workflow is the backbone of any successful engineering team. It provides a clear, repeatable path from an initial idea to a production-ready application. This organized approach helps you build better products faster.

This article details the stages, components, and best practices for creating a powerful workflow. We will cover everything from project management and version control to automation and release management. You'll get actionable insights to improve your team's productivity and code quality.

What is a Software Development Workflow?

A software development workflow is the specific, repeatable pattern of activities that a team uses to design, build, test, and release software. It is the practical application of a software development lifecycle (SDLC) model.

This framework integrates directly with the broader development lifecycle. While the SDLC provides a high-level model (like Agile or Waterfall), the workflow details the specific tools, steps, and handoffs, such as how pull requests are reviewed or how code is pushed to production.

Key components of a typical workflow include:

  • Source Code Management: How code is stored, versioned, and merged.

  • Project Management: How tasks are defined, assigned, and tracked.

  • Automation Pipelines: The continuous integration and deployment systems.

  • Communication Protocols: The established channels for team interaction.

Continuous optimization is essential. A great workflow is never static; it is regularly reviewed and refined. According to Digital.ai's 17th State of Agile Report, 71% of companies use Agile in their software development lifecycle.

Stages of a Software Development Workflow

Understanding the distinct stages helps organize and manage the creation process from start to finish. Teams generally follow a comprehensive process that can be viewed through two different lenses: the full lifecycle and the core workflow.

7 Stages of Software Development Process

This represents the complete journey of a software product.

  1. Conceptualization and planning: This initial stage involves brainstorming, market research, and feasibility analysi. Your team defines the project's goals, scope, and initial requirements, often formalizing them in documents such as Product Requirements Documents (PRDs) or use cases.

  2. Design and prototyping: Architects and designers create the system's architecture and user interface (UI). They produce wireframes, mockups, and prototypes to validate the design concepts.

  3. Development and coding: Developers write the actual code based on the design specifications. This is where the application's features and logic are built.

  4. Testing: The quality assurance (QA) team rigorously tests the software for bugs, performance issues, and security vulnerabilities. This stage ensures the code meets quality standards.  Deepen your approach with component testing, state transition testing, and a secure code review checklist.

  5. Deployment: The finished code is released to the production environment, making it available to end-users. This can be a manual or automated process.

  6. Maintenance: After release, the team provides ongoing support. This includes fixing bugs, updating systems, and ensuring the application runs smoothly.

  7. Feedback and Iteration: The team gathers user feedback to inform future updates and improvements. This feedback loop drives the next cycle of development.

5 Stages of Workflow

This five-stage model describes the core development cycle. It's particularly well-suited for teams using Agile methodologies, like Scrum or Kanban, that operate in short, iterative cycles. This approach allows for frequent feedback and adaptation.

  1. Planning: The team determines the work for the next cycle, often called a sprint. They select tasks from a product backlog and establish the objectives.

  2. Design: For each task, the team outlines the technical solution and user interface. This might include creating technical specifications, wireframes, or user interface mockups.

  3. Development: Programmers write the code for the planned features. This is the main construction phase where ideas are turned into functional software.

  4. Testing: The new code is checked for correctness through automated tests and manual verification. This is frequently integrated into the development stage using continuous integration (CI) practices.

  5. Deployment: After a feature is finished and verified, it's merged into the main codebase and released. With a continuous deployment (CD) model, this step occurs automatically after successful testing.

Key Elements of an Effective Workflow

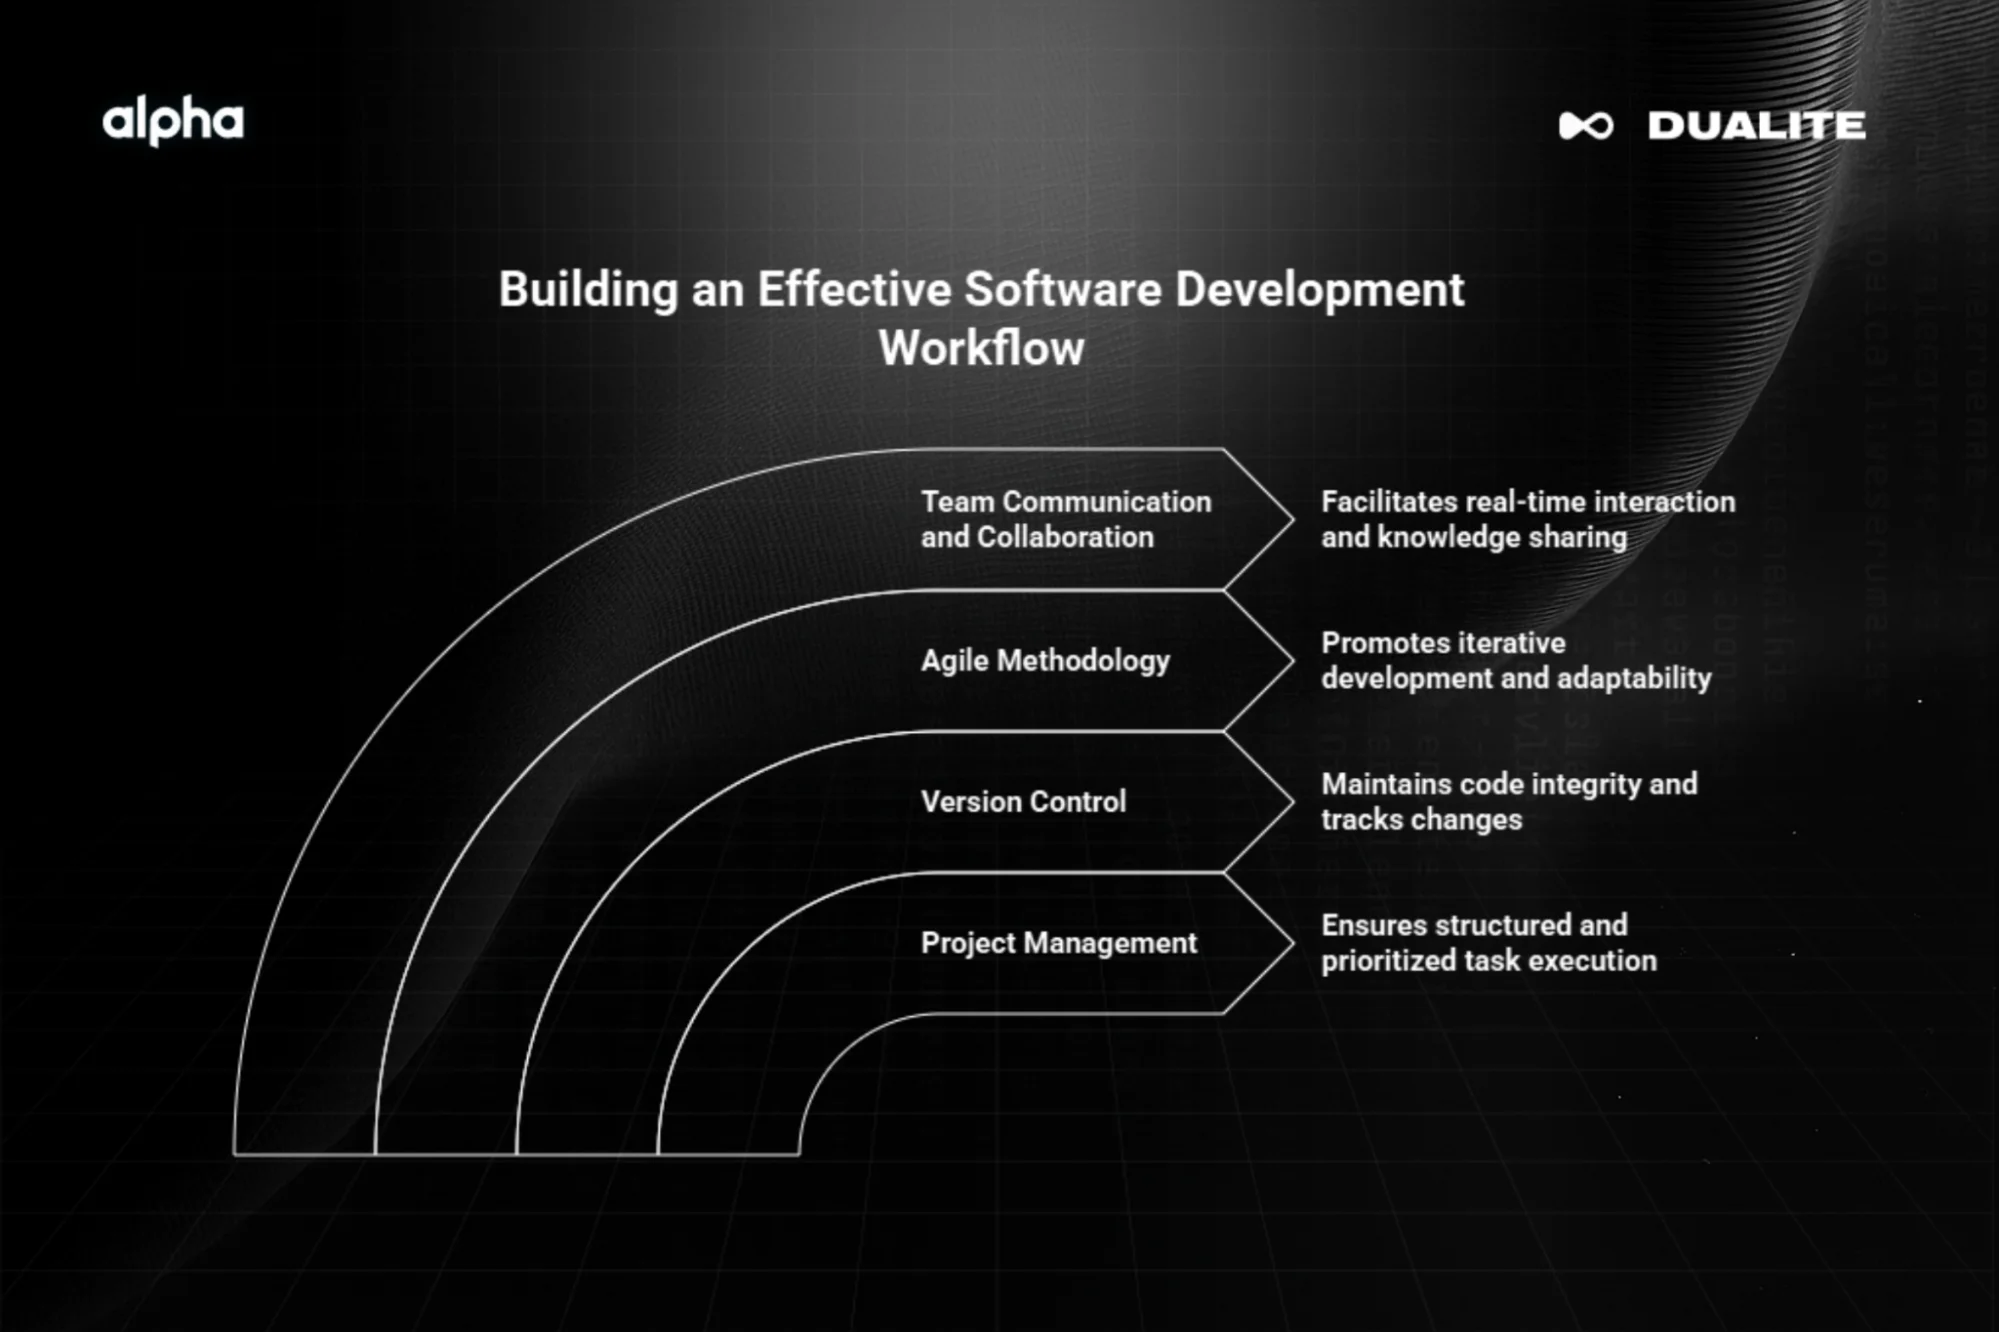
An effective software development workflow is built on a foundation of strong project management, rigorous version control, agile methodologies, and clear communication. These elements work together to create a predictable and efficient process.

Key Elements of an Effective Workflow

1) Project Management

Effective project management provides the structure for your team's work. It ensures everyone knows what to work on, what the priorities are, and when tasks are due.

You can manage projects with collaborative tools like Jira and Trello. These platforms allow you to create task boards, visualize progress, and manage backlogs, making the entire process transparent.

Task prioritization and tracking are fundamental. By focusing on the most important work first, you deliver value to users faster. Tracking progress helps identify bottlenecks before they derail your schedule.

The project manager is central to the software development workflow. They facilitate planning sessions, remove obstacles for the development team, and communicate with stakeholders to keep everyone informed.

2) Version Control

Version control is essential for maintaining code integrity in a team environment. It acts as a safety net, allowing you to track changes and revert to previous versions if something goes wrong.

Using GitHub and Git is the industry standard for version control. Git is the underlying technology, while GitHub provides a cloud-based hosting service with powerful collaboration features.

Following best practices in branching, commits, and pull requests is vital. A consistent branching strategy, like GitFlow, prevents chaotic codebase merges. Atomic commits with clear messages make your code history understandable. Pull requests serve as a formal process for code review and discussion before merging.

Here is a simple example of a feature branch workflow:

Bash

# Create and switch to a new feature branch
git checkout -b feature/user-authentication

# Work on the feature and add your changes
git add .
git commit -m "feat: Implement user login endpoint"

# Push the branch to the remote repository for review
git push origin feature/user-authentication

3) Agile Methodology

Agile development processes are iterative approaches that focus on collaboration and customer feedback. Instead of a single, long development cycle, Agile breaks work into small increments.

Scrum is a popular framework for implementing Agile. Work is organized into "sprints," which are short, time-boxed periods (usually 1–4 weeks). To maintain coordination and continuous improvement, teams conduct regular ceremonies such as daily stand-ups to sync on progress and sprint retrospectives to refine their process. Each sprint concludes with a demonstration of a potentially shippable increment of the product.

The benefits of Agile are significant. It allows a team to adapt to changing requirements quickly. According to a 2025 TechReport 71% of organizations now apply Agile approaches, citing increased speed to market and team productivity as primary advantages.

The core principles of Agile software development include:

  • Customer satisfaction through early and continuous delivery.

  • Welcoming changing requirements, even late in development.

  • Delivering working software frequently.

  • Daily collaboration between business people and developers.

  • Building projects around motivated individuals.

4) Team Communication and Collaboration

Effective communication is essential to a workflow, as misunderstandings lead to wasted effort and defects.

While tools like Slack can facilitate real-time team collaboration, managing the information flow is vital to prevent overload. To achieve this, it is useful to institute practices such as standardized channel naming conventions (e.g., #proj-alpha, #tech-discussion, #alerts-builds) to direct information appropriately. Encouraging asynchronous status updates—where individuals post their progress at set intervals instead of giving constant reports—also reduces interruptions.

Setting up collaborative documentation systems is also important. A central, accessible knowledge base prevents information silos and helps onboard new team members quickly.

Streamlining Software Development with Automation

Automation is a cornerstone of a modern software development workflow. By automating repetitive tasks, you free up developers to focus on creative problem-solving and reduce the risk of human error.

Continuous Integration (CI)

Continuous Integration (CI) is a practice where developers frequently merge their code changes into a central repository. After each merge, an automated build and test sequence is run.

CI is important in modern workflows because it helps detect integration bugs early. It ensures that the main codebase is always in a healthy, buildable state.

You can implement CI with key tools like Jenkins and GitHub Actions. These tools automate the process of building, testing, and validating code changes as soon as they are pushed.

A simple CI pipeline in a ci.yml file might look like this:

YAML

name: Node.js CI

on:
  push:
    branches: [ main ]
  pull_request:
    branches: [ main ]

jobs:
  build:
    runs-on: ubuntu-latest
    steps:
    - uses: actions/checkout@v3
    - name: Use Node.js
      uses: actions/setup-node@v3
      with:
        node-version: '20.x'
    - run: npm ci
    - run: npm run build --if-present
    - run: npm test

CI best practices include maintaining a single source repository, automating the build, and making the build self-testing. Every commit should trigger a build to ensure rapid feedback.

Testing Automation

Automating tests provides a safety net that allows your team to make changes confidently. It includes unit tests for individual components, integration tests for component interactions, and end-to-end tests that validate the entire application.

The benefits are immense. Automated testing catches regressions immediately, improves code quality, and accelerates the feedback loop for developers. Studies show that teams with high test automation coverage spend 50% less time fixing bugs in production.

Tools like Postman (for APIs) and containerization platforms like Docker help you implement testing automation. You can create consistent, isolated environments to run tests, eliminating the "it works on my machine" problem.

Setting up a test-driven development (TDD) workflow is a powerful practice. In TDD, you write a failing test before you write the production code to pass that test. This ensures that your code is testable by design.

Deployment Pipeline

A deployment pipeline is the automated manifestation of your release process. It is an extension of CI, known as continuous deployment (CD) or continuous delivery.

An overview of a CD pipeline involves a series of automated stages. A code change that passes all CI checks is automatically deployed to a staging environment for additional testing and then, if successful, to production.

Setting up a dependable pipeline ensures quick and secure releases. By automating deployments, you reduce the risk of manual errors and can release updates to users multiple times a day. For high-risk deployments, however, it is prudent to include a manual approval step. This provides a final check, balancing the speed of automation with the need for careful oversight.

Docker and Kubernetes are instrumental in automating deployments. Docker allows you to package your application into a portable container. Kubernetes orchestrates these containers, managing deployment, scaling, and operations automatically across a cluster of machines.

Code Quality and Collaboration

A workflow must have mechanisms to maintain high code quality and facilitate collaboration. These systems ensure the long-term health and maintainability of your codebase architecture.

Code Reviews

Code reviews are a critical practice for maintaining high code quality. A second pair of eyes can spot bugs, logical errors, or design flaws that the original author might have missed.

You can conduct code reviews using the built-in features of GitHub or GitLab. The pull request (or merge request) feature provides a dedicated forum for discussing and iterating on code before it is integrated.

To make code review a smooth process, keep pull requests small and focused on a single change. Provide constructive, non-confrontational feedback. Automate linting and style checks to focus human review time on logic and architecture.

Bug Tracking

Issue tracking is the systematic process of identifying, reporting, and resolving bugs. An effective bug tracking system provides a central database of all known issues, their status, and their priority.

Popular bug tracking tools include Jira, Trello, and GitHub Issues. These tools integrate well with the development process, allowing you to link issues directly to code commits and pull requests. For improved visibility, they can also be connected with communication platforms like Slack or email, ensuring teams receive timely notifications about new issues and status changes.

Best practices for issue tracking include creating clear, reproducible bug reports. It is useful to have standardized templates and labels to categorize issues by priority (e.g., critical, high, medium) and type (e.g., bug, feature, technical debt).

Documentation Standards

Clear documentation is crucial in the software development workflow. It helps team members understand the codebase, the system architecture, and the project's operational procedures.

Set up a collaborative documentation system like Confluence or a simple project Wiki. This creates a single source of truth that is accessible to everyone on the team, from developers to project managers.

Ensure your coding and technical documentation are always up-to-date. Documenting your code with comments is a start, but high-level architectural documents are also necessary. A good practice is to update documentation as part of the "definition of done" for any new feature. Learn more in code documentation best practices.

Release Management

Release management is the process of managing, planning, scheduling, and controlling a software build through different stages and environments. It ensures that every release is predictable and stable.

Release Management Workflow

A typical release management workflow includes several steps.

  1. Preparation: This involves planning the release, finalizing the features to be included, and running all final tests.

  2. Staging: The release candidate is deployed to a staging environment, which is a production-like replica. Here, it undergoes final validation and user acceptance testing (UAT).

  3. Production: Once approved, the release is deployed to the production environment for all users.

  4. Post-Release Monitoring: After deployment, continuously monitor the release in the production environment. This practice helps to quickly identify and address any issues. Using observability tools like Datadog or Sentry provides real-time insights into application performance and errors.

You should implement a versioned release system, such as Semantic Versioning (SemVer). This practice assigns a version number (e.g., MAJOR.MINOR.PATCH) to each release, clearly communicating the nature of the changes.

Key tools and practices for release management include automated deployment scripts, feature flags, and rollback plans. Feature flags allow you to deploy code to production but keep new features hidden until they are ready, decoupling deployment from release.

Top 10 Tools That Help Improve Software Development Workflow

The right tech stack can significantly improve your team's efficiency. These tools automate tasks, enhance collaboration, and provide critical insights into your development process.

  1. Dualite Alpha: Automates repetitive frontend development tasks. It helps you synchronize code, validate components, and improve collaboration between designers and developers.

  2. Jira: A powerful tool for project management and issue tracking. It helps you plan sprints, track progress on a kanban board, and generate reports on team velocity.

  3. VS Code: A popular, lightweight integrated development environment (IDE). It offers a rich ecosystem of extensions for debugging, Git integration, and language support.

  4. GitHub: The leading platform for version control and collaboration. It combines Git hosting with pull requests, issue tracking, and a CI/CD system (GitHub Actions).

  5. Docker: A containerization platform for building and running applications in isolated environments. It ensures consistency from development to production.

  6. Slack: A communication hub for real-time team collaboration. It integrates with hundreds of other development tools to bring notifications and alerts into one place.

  7. Jenkins: An open-source automation server for continuous integration and continuous deployment. It is highly extensible and supports a vast number of plugins.

  8. Embold: A static code analysis platform that provides deep insights into code health. It helps you find bugs, security vulnerabilities, and design issues before they reach production.

  9. Postman: An API platform for building and using APIs. It helps you design, test, and document your APIs, which is essential for a microservices architecture.

  10. GitLab: An all-in-one DevOps platform. It combines source code management, CI/CD, security scanning, and project management in a single application.

This selection of tools addresses every part of the software development workflow, from planning to deployment.

10 Best Practices for Optimizing Your Development Workflow

Optimizing your workflow is an ongoing activity. By adopting proven best practices, you can create a more efficient, predictable, and enjoyable development environment. Here are ten practices to streamline your process.

  1. Standardize Your Environments: Use tools like Docker to ensure development, staging, and production environments are as similar as possible.

  2. Automate Everything Repetitive: Automate your builds, tests, and deployments to reduce manual work and errors.

  3. Keep a Lean Backlog: Regularly groom your product backlog to remove outdated items and ensure priorities are clear.

  4. Implement Small, Frequent Releases: Releasing in small batches reduces risk and gets feedback from users faster.

  5. Use Feature Flags: Decouple code deployment from feature release. This lets you test in production safely.

  6. Prioritize the Developer Experience (DevEx): Invest in fast machines, good tools, and streamlined processes. A happy developer is a productive developer.

  7. Conduct Blameless Postmortems: When an incident occurs, focus on identifying process flaws, not blaming individuals.

  8. Invest in Asynchronous Communication: Document decisions and discussions to reduce the need for meetings and respect focus time.

  9. Secure Your Supply Chain: Use automated tools to scan dependencies for vulnerabilities. A secure software development workflow is non-negotiable.

  10. Establish a Clear Git Branching Strategy: A strategy like GitFlow or GitHub Flow brings order to your codebase.

Continuous feedback loops and retrospectives are essential. At the end of each sprint or project, your team should discuss what went well and what could be improved. This institutionalizes the practice of continuous improvement.

Pair programming, pull requests, and automated testing are powerful techniques. Pair programming improves code quality and shares knowledge. Pull requests formalize the review process. Automated tests provide the confidence to refactor and iterate quickly.

Optimizing Your Workflow Using Git and CI/CD

You can manage your Git workflow efficiently by using a clear branching model and writing descriptive commit messages. These simple disciplines make your project history easy to follow.

Setting up a CI/CD pipeline creates a smooth transition from code commit to production. It acts as a quality gate, ensuring that only tested, high-quality code reaches your users. A good pipeline is the backbone of an effective software development workflow.

Conclusion

A solid software development workflow is not a luxury; it is a necessity for any modern engineering team. It provides the structure needed to build high-quality software consistently and at scale. It transforms a chaotic process into a predictable, efficient system.

We encourage you and your team to implement these practices. Start small by automating one part of your testing suite or standardizing your code review process. Each improvement contributes to better productivity and superior code quality.

The methods for building software are constantly being refined. By committing to continuous optimization and embracing automation, your team will be well-equipped to create outstanding products now and in the future.

FAQs

1) What is the software development workflow? 

A software development workflow refers to the series of processes, tools, and practices that a development team follows from the planning stage to the final deployment and maintenance of a software application.

2) What are the 7 stages of the software development process? 

  1. Conceptualization and planning

  2. Design and prototyping

  3. Development and coding

  4. Testing

  5. Deployment

  6. Maintenance

  7. Feedback and Iteration

3) What are the 5 stages of workflow? 

  1. Planning

  2. Design

  3. Development

  4. Testing

  5. Deployment

4) What are the 5 steps of the software development process? 

  1. Requirement gathering

  2. Design

  3. Implementation

  4. Testing

  5. Maintenance

Overview

Ready to build real products at lightning speed?

Try the AI platform to turn your idea into reality in minutes!

Other Articles

Figma Design To Code: Step-by-Step Guide 2025

Figma Design To Code: Step-by-Step Guide 2025

The gap between a finished design and functional code is a known friction point in product development. For non-coders, it’s a barrier. For busy frontend developers, it's a source of repetitive work that consumes valuable time. The process of translating a Figma design to code, while critical, is often manual and prone to error.

This article introduces the concept of Figma design to code automation. We will walk through how Dualite Alpha bridges the design-to-development gap. It offers a way to quickly turn static designs into usable, production-ready frontend code, directly in your browser.

Why “Figma Design to Code” Matters

UI prototyping is the stage where interactive mockups are created. The design handoff is the point where these approved designs are passed to developers for implementation. Dualite fits into this ecosystem by automating the handoff, turning a visual blueprint into a structural codebase.

The benefits are immediate and measurable.

  • Saves Time: Research shows that development can be significantly faster with automated systems. A study by Sparkbox found that using a design system made a simple form page 47% faster to develop versus coding it from scratch. This frees up developers to focus on complex logic.

  • Reduces Errors: Manual translation introduces human error. Automated conversion ensures visual and structural consistency between the Figma file and the initial codebase. According to Aufait UX, teams using design systems can reduce errors by as much as 60%.

  • Smoother Collaboration: Tools that automate code generation act as a common language between designers and developers. They reduce the back-and-forth communication that often plagues projects. Studies on designer-developer collaboration frequently point to communication issues as a primary challenge.

Why “Figma Design to Code” Matters


This approach helps both non-coders and frontend developers. It provides a direct path to creating responsive layouts and functional components, accelerating the entire development lifecycle.

Getting Started with Dualite Alpha

Dualite Alpha is a platform that handles the entire workflow from design to deployment. It operates within your browser, requiring no server storage for your projects. This enhances security and privacy.

Its core strengths are:

  • Direct Figma Integration: Dualite works with Figma without needing an extra plugin. You can connect your designs directly.

  • Automated Code Generation: The platform intelligently interprets Figma designs to produce clean, structured code.

  • Frontend Framework Support: It generates code for React, Tailwind CSS, and plain HTML/CSS, fitting into modern tech stacks.


Getting Started with Dualite Alpha


Dualite serves as a powerful accelerator for any team looking to improve its Figma design to code workflow.

Figma Design to Code: Step-by-Step Tutorial

The following tutorial breaks down the process of converting your designs into code. For a visual guide, the video below offers a complete masterclass, showing how to build a functional web application from a Figma file using Dualite Alpha. The demonstration covers building a login page, handling page redirection, making components functional, and ensuring responsiveness.


Step 1: Open Dualite and Connect Your Figma Account

First, go to dualite.dev and select "Try Dualite Now" to open the Dualite (Alpha) interface. Within the start screen, click on the Figma icon and then "Connect Figma." You will be prompted to authorize the connection via an oAuth window. It is crucial to select the Figma account that owns the design file you intend to use.

Open Dualite and Connect Your Figma Account


Open Dualite and Connect Your Figma Account


Open Dualite and Connect Your Figma Account


Step 2: Copy the Link to Your Figma Selection

In Figma, open your design file and select the specific Frame, Component, or Instance that you want to convert. Right-click on your selection, go to "Copy/Paste as," and choose "Copy link to selection."

Step 3: Import Your Figma Design into Dualite

Return to Dualite and paste the copied URL into the "Import from Figma" field. Click "Import." Dualite will process the link, and a preview of your design will appear along with a green checkmark to indicate that the design has been recognized.

Import Your Figma Design into Dualite


Import Your Figma Design into Dualite


Step 4: Confirm and Continue

Review the preview to ensure it accurately represents your selection. If everything looks correct, click "Continue with this design" to proceed.

Step 5: Select the Target Stack and Generate the Initial Build

In the "Framework" dropdown menu, choose your desired stack, such as React. Then, in the chat box, provide a simple instruction like, "Build this website based on the Figma file." Dualite will then parse the imported design and generate the working code along with a live preview.

Select the Target Stack and Generate the Initial Build


Step 6: Iterate and Refine with Chat Commands

You can make further changes to your design using short, conversational follow-ups in the chat. For instance, you can request to make the hero section responsive for mobile, turn a button into a link, or extract the navigation bar into a reusable component. This iterative chat feature is designed for making stepwise changes after the initial build.

Step 7: Inspect, Edit, and Export Your Code

You can switch between the "Preview" and "Code" views using the toggle at the top of the screen. This allows you to open files, tweak styles or logic, and save your changes directly within Dualite’s editor. When you are finished, you can download the code as a ZIP file to use it locally. Alternatively, you can push the code to GitHub with the built-in two-way sync, which allows you to import an existing repository, push changes, or create a new repository from your project.

Step 8: Deploy Your Website

Finally, to publish your site, click "Deploy" in the top-right corner and connect your Netlify account.

This is highly useful for teams that need to prototype quickly. It also strengthens collaboration between design and development by providing a shared, code-based foundation. Research from zeroheight shows that design-to-development handoff efficiency can increase by 50% with such systems.

Conclusion

Dualite simplifies the Figma design to code process. It provides a practical, efficient solution for turning visual concepts into tangible frontend code.

The platform benefits both designers and developers. It creates a bridge between roles, reducing friction and speeding up the development cycle. By adopting a hybrid approach—using generated code as a foundation and refining it—teams can gain a significant advantage in their workflow. 

The future of frontend development is about working smarter, and tools like Dualite are central to that objective. The efficiency of a Figma design to code workflow is a clear step forward. A focus on better tools will continue to improve the Figma design to code process. This makes the Figma design to code strategy a valuable one. For any team, improving the Figma design to code pipeline is a worthy goal.


FAQ Section

1) Can I convert Figma design to code? 

Yes. Tools like Dualite let you convert Figma designs into React, HTML/CSS, or Tailwind CSS code with a few clicks. Figma alone provides only basic CSS snippets, not full layouts or structure.

2) Can ChatGPT convert Figma design to code? 

Not directly. ChatGPT cannot parse Figma files. You can describe a design and ask for code suggestions, but it cannot generate accurate front-end layouts from actual Figma prototypes.

3) Does Figma provide code for design? 

Figma’s Dev Mode offers CSS and SVG snippets, but not full production-ready code. Most developers still hand-write the structure, style, and logic based on those hints.

4) What tool converts Figma to code? 

Dualite is one such tool that turns Figma designs into clean code quickly. Other tools exist, but users report mixed results—often fine for prototypes, but not always clean or maintainable.

Figma & No-code

Shivam Agarwal

Featured image for an article on Secure code review checklist

Secure Code Review Checklist for Developers

Writing secure code is non-negotiable in modern software development. A single vulnerability can lead to data breaches, system downtime, and a loss of user trust. The simplest, most effective fix is to catch these issues before they reach production. This is accomplished through a rigorous code review process, guided by a secure code review checklist.

A secure code review checklist is a structured set of guidelines and verification points used during the code review process. It ensures that developers consistently check for common security vulnerabilities and adhere to best practices. For instance, a checklist item might ask, "Is all user-supplied input validated and sanitized to prevent injection attacks (e.g., SQLi, XSS)?

This article provides a detailed guide to creating and using such a checklist, helping you build more resilient and trustworthy applications from the ground up. We will cover why a checklist is essential, how to prepare for a review, core items to include, and how to integrate automation to make the process efficient and repeatable.

TL;DR: Secure Code Review Checklist

A secure code review checklist is a structured guide to ensure code is free from common security flaws before reaching production. The core items include:

  • Input Validation – Validate and sanitize all user input on the server side.


  • Output Encoding – Use context-aware encoding to prevent XSS.


  • Authentication & Authorization – Enforce server-side checks, hash & salt passwords, follow least privilege.


  • Error Handling & Logging – Avoid leaking sensitive info, log security-relevant events without secrets.


  • Data Encryption – Encrypt data at rest and in transit using strong standards (TLS 1.2+, AES-256).


  • Session Management – Secure tokens, timeouts, HttpOnly & Secure cookies.


  • Dependency Management – Use SCA tools, keep libraries updated.


  • Logging & Monitoring – Track suspicious activity, monitor alerts, protect log files.


  • Threat Modeling – Continuously validate assumptions and attack vectors.


  • Secure Coding Practices – Follow OWASP, CERT, and language-specific standards.

Use this checklist during manual reviews, supported by automation (SAST/SCA tools), to catch vulnerabilities early, reduce costs, and standardize secure development practices.

Why Use a Secure Code Review Checklist?

Code quality and vulnerability assessment are two sides of the same coin. A checklist provides a systematic approach to both. It helps standardize the review process across your entire team, ensuring no critical security checks are overlooked. This is why we use a secure code review checklist.

The primary benefit is catching security issues early in the development lifecycle. Fixing a vulnerability during development is significantly less costly and time-consuming than patching it in production. According to a report by the Systems Sciences Institute at IBM, a bug found in production is six times more expensive to fix than one found during design and implementation.

Organizations like the Open Web Application Security Project (OWASP) provide extensive community-vetted resources that codify decades of security wisdom. A checklist helps you put this wisdom into practice. Even if the checklist items seem obvious, the act of using one frames the reviewer's mindset, focusing their attention specifically on security concerns. This focus alone significantly increases the likelihood of detecting vulnerabilities that might otherwise be missed.

  • Standardization: Ensures every piece of code gets the same security scrutiny.

  • Efficiency: Guides reviewers to the most critical areas quickly.

  • Early Detection: Finds and fixes flaws before they become major problems.

  • Knowledge Sharing: Acts as a teaching tool for junior developers.

Preparing Your Secure Code Review

A successful review starts before you look at a single line of code. Proper preparation ensures your efforts are focused and effective. Without a plan, reviews can become unstructured and miss critical risks.

Preparing Your Secure Code Review

Threat Modeling First

Before reviewing code, you must understand the application's potential threats. Threat modeling is a process where you identify security risks and potential vulnerabilities.

Ask questions like:

  • Where does the application handle sensitive data?

  • What are the entry points for user input?

  • How do different components authenticate with each other?

  • What external systems does the application trust?

This analysis helps you pinpoint high-risk areas of the codebase architecture that demand the most attention.

Define Objectives

Clarify the goals of the review. Are you hunting for specific bugs, verifying compliance with a security standard, or improving overall code quality? Defining your objectives helps focus the review and measure its success.

Set Scope

You do not have to review the entire codebase at once. Start with the most critical and high-risk code segments identified during threat modeling.

Focus initial efforts on:

  • Authentication and Authorization Logic: Code that handles user logins and permissions.

  • Session Management: Functions that create and manage user sessions.

  • Data Encryption Routines: Any code that encrypts or decrypts sensitive information.

  • Input Handling: Components that process data from users or external systems.

Gather the Right Tools and People

Assemble a review team with a good mix of skills. Include the developer who wrote the code, a security-minded developer, and, if possible, a dedicated security professional. This combination of perspectives provides a more thorough assessment.

Equip the team with the proper tools, including access to the project's documentation and specialized software. For instance, static analysis tools can automatically scan for vulnerabilities. For threat modeling, you might use OWASP Threat Dragon, and for automation, a platform like GitHub Actions can integrate security checks directly into the workflow.

Core Secure Code Review Checklist Items

This section contains the fundamental items that should be part of any review. Each one targets a common area where security vulnerabilities appear.

1) Input Validation

Attackers exploit applications by sending malicious or unexpected input. Proper input validation is your first line of defense.

  • Validate on the Server Side: Never trust client-side validation alone. Attackers can easily bypass it. Always re-validate all inputs on the server.

  • Classify Data: Separate data into trusted (from internal systems) and untrusted (from users or external APIs) sources. Scrutinize all untrusted data.

  • Centralize Routines: Create and use a single, well-tested library for all input validation. This avoids duplicated effort and inconsistent logic.

  • Canonicalize Inputs: Convert all input into a standard, simplified form before processing. For example, enforce UTF-8 encoding to prevent encoding-based attacks.

2) Output Encoding

Output encoding prevents attackers from injecting malicious scripts into the content sent to a user's browser. This is the primary defense against Cross-Site Scripting (XSS).

  • Encode on the Server: Always perform output encoding on the server, just before sending it to the client.

  • Use Context-Aware Encoding: The method of encoding depends on where the data will be placed. Use specific routines for HTML bodies, HTML attributes, JavaScript, and CSS.

  • Utilize Safe Libraries: Employ well-tested libraries provided by your framework to handle encoding. Avoid writing your own encoding functions.

3) Authentication & Authorization

Authentication confirms a user's identity, while authorization determines what they are allowed to do. Flaws in these areas can give attackers complete control.

  • Enforce on the Server: All authentication and authorization checks must occur on the server.

  • Use Tested Services: Whenever possible, integrate with established identity providers or use your framework's built-in authentication mechanisms.

  • Centralize Logic: Place all authorization checks in a single, reusable location to ensure consistency.

  • Hash and Salt Passwords: Never store passwords in plain text. Use a strong, adaptive hashing algorithm like Argon2 or bcrypt with a unique salt for each user.

  • Use Vague Error Messages: On login pages, use generic messages like "Invalid username or password." Specific messages ("User not found") help attackers identify valid accounts.

  • Secure External Credentials: Protect API keys, database credentials, and other secrets. Store them outside of your codebase using a secrets management tool.

4) Error Handling & Logging

Proper error handling prevents your application from leaking sensitive information when something goes wrong.

  • Avoid Sensitive Data in Errors: Error messages shown to users should never contain stack traces, database queries, or other internal system details.

  • Log Sufficient Context: Your internal logs should contain enough information for debugging, such as a timestamp, the affected user ID (if applicable), and the error details.

  • Do Not Log Secrets: Ensure that passwords, API keys, session tokens, and other sensitive data are never written to logs.

5) Data Encryption

Data must be protected both when it is stored (at rest) and when it is being transmitted (in transit).

  • Encrypt Data in Transit: Use Transport Layer Security (TLS) 1.2 or higher for all communication between the client and server.

  • Encrypt Data at Rest: Protect sensitive data stored in databases, files, or backups.

  • Use Proven Standards: Implement strong, industry-accepted encryption algorithms like AES-256. For databases, use features like Transparent Data Encryption (TDE) or column-level encryption for the most sensitive fields.

6) Session Management & Access Controls

Once a user is authenticated, their session must be managed securely. Access controls ensure users can only perform actions they are authorized for.

  • Secure Session Tokens: Generate long, random, and unpredictable session identifiers. Do not include any sensitive information within the token itself.

  • Expire Sessions Properly: Sessions should time out after a reasonable period of inactivity. Provide users with a clear log-out function that invalidates the session on the server.

  • Guard Cookies: Set the Secure and HttpOnly flags on session cookies. This prevents them from being sent over unencrypted connections or accessed by client-side scripts.

  • Enforce Least Privilege: Users and system components should only have the minimum permissions necessary to perform their functions.

7) Dependency Management

Modern applications are built on a foundation of third-party libraries and frameworks. A vulnerability in one of these dependencies is a vulnerability in your application.

  • Use Software Composition Analysis (SCA) Tools: These tools scan your project to identify third-party components with known vulnerabilities.

  • Keep Dependencies Updated: Regularly update your dependencies to their latest stable versions. Studies from organizations like Snyk regularly show that a majority of open-source vulnerabilities have fixes available. A 2025 Snyk report showed projects using automated dependency checkers fix vulnerabilities 40% faster.

8) Logging & Monitoring

Secure logging and monitoring help you detect and respond to attacks in real-time.

  • Track Suspicious Activity: Log security-sensitive events such as failed login attempts, access-denied errors, and changes to permissions.

  • Monitor Logs: Use automated tools to monitor logs for patterns that could indicate an attack. Set up alerts for high-priority events.

  • Protect Your Logs: Ensure that log files are protected from unauthorized access or modification.

9) Threat Modeling

During the review, continuously refer back to your threat model. This helps maintain focus on the most likely attack vectors.

  • Review Data Flows: Trace how data moves through the application.

  • Validate Trust Boundaries: Pay close attention to points where the application interacts with external systems or receives user input.

  • Question Assumptions: Could an attacker manipulate this data flow? Could they inject code or bypass a security control?

10) Code Readability & Secure Coding Standards

Clean, readable code is easier to secure. Ambiguous or overly complex logic can hide subtle security flaws.

  • Write Clear Code: Use meaningful variable names, add comments where necessary, and keep functions short and focused.

  • Use Coding Standards: Adhere to established secure coding standards for your language. Some great resources are the OWASP Secure Coding Practices, the SEI CERT Coding Standards, and language-specific guides.

11) Secure Data Storage

How and where you store sensitive data is critical. This goes beyond just encrypting the database.

  • Protect Backups: Ensure that database backups are encrypted and stored in a secure location with restricted access.

  • Sanitize Data: When using production data in testing or development environments, make sure to sanitize it to remove any real user information.

  • Limit Data Retention: Only store sensitive data for as long as it is absolutely necessary. Implement and follow a clear data retention policy.

Automated Tools to Boost Your Checklist

Manual reviews are essential for understanding context and business logic, but they can be slow and prone to human error. For smaller teams, free and open-source tools like SonarQube, Snyk, and Semgrep perfectly complement a manual secure code review checklist by catching common issues quickly and consistently.

Integrate SAST and SCA into CI/CD

Integrate Static Application Security Testing (SAST) and Software Composition Analysis (SCA) tools directly into your Continuous Integration/Continuous Deployment (CI/CD) pipeline. This automates the initial security scan on every code commit.

  • SAST Tools: These tools analyze your source code without executing it. They are excellent at finding vulnerabilities like SQL injection, buffer overflows, and insecure configurations.

  • SCA Tools: These tools identify all the open-source libraries in your codebase and check them against a database of known vulnerabilities.

Configure Security-Focused Rules

Configure your automated tools to enforce specific security rules tied to standards like OWASP Top 10 or the SEI CERT standards. This ensures that the automated checks are directly connected to your security requirements.

Popular Static Analysis Tools

Several tools can help automate parts of your review:

  • PVS-Studio: A static analyzer for C, C++, C#, and Java code.

  • Semgrep: A fast, open-source static analysis tool that supports many languages and allows for custom rules.

  • SonarQube: An open-platform to manage code quality, which includes security analysis features.

Automated code review cycle

Running The Review

With your preparation complete and checklist in hand, it is time to conduct the review. A structured approach makes the process more efficient and less draining for the participants.

Timebox Your Sessions

Limit each review session to about 60-90 minutes. Longer sessions can lead to fatigue and reduced focus, making it more likely that reviewers will miss important issues. It is better to have multiple short, focused sessions than one long, exhaustive one.

Apply the Checklist Systematically

Work through your checklist steadily. Start with the high-risk areas you identified during threat modeling. Use a combination of automated tools and manual inspection.

  1. Run Automated Scans First: Let SAST and SCA tools perform an initial pass to catch low-hanging fruit.

  2. Manually Inspect High-Risk Code: Use your expertise and the checklist to examine authentication, authorization, and data handling logic.

  3. Validate Business Logic: Check for flaws in the application's logic that an automated tool would miss.

Track Metrics for Improvement

To make your process repeatable and measurable, track key metrics.

Metric

Description

Purpose

Tracking Tools

Inspection Rate

Lines of code reviewed per hour.

Helps in planning future reviews.

Code review systems (Crucible, Gerrit) or custom dashboards (Grafana, Tableau) pulling data from version control.

Defect Density

Number of defects found per 1,000 lines of code.

Measures code quality over time.

Static analysis tools (SonarQube) and issue trackers (Jira, GitHub Issues).

Time to Remediate

Time taken to fix a reported issue.

Measures the efficiency of your response process.

Issue trackers like Jira, GitHub Issues, Asana, or service desk software like Zendesk.

Keeping Your Process Up to Date

Security is not a one-time activity. The threat environment is constantly changing, and your review process must adapt. An effective secure code review checklist is a living document.

Update for New Threats

Regularly review and update your checklist to include checks for new types of vulnerabilities. Stay informed by following security publications from organizations like NIST and OWASP. When a new major vulnerability is disclosed (like Log4Shell), update your checklist to include specific checks for it.

Build a Security-First Mindset

The ultimate goal is to create a team where everyone thinks about security. Use the code review process as an educational opportunity. When you find a vulnerability, explain the risk and the correct way to fix it. This continuous training builds a stronger, more security-aware engineering team.

Sample “Starter” Checklist

Here is a starter secure code review checklist based on the principles discussed. You can use this as a foundation and customize it for your specific tech stack and application. This is structured in a format you can use in a GitHub pull request template.

For a more detailed baseline, the OWASP Code Review Guide and the associated Quick Reference Guide are excellent resources.

Input Validation

  • [Critical] Is the application protected against injection attacks (SQLi, XSS, Command Injection)?

  • [Critical] Is all untrusted input validated on the server side?

  • [High] Is input checked for length, type, and format?

  • [Medium] Is a centralized input validation routine used?

Authentication & Authorization

  • [Critical] Are all sensitive endpoints protected with server-side authentication checks?

  • [Critical] Are passwords hashed using a strong, salted algorithm (e.g., Argon2, bcrypt)?

  • [Critical] Are authorization checks performed based on the user's role and permissions, not on incoming parameters?

  • [High] Are account lockout mechanisms in place to prevent brute-force attacks?

  • [High] Does the principle of least privilege apply to all user roles?

Session Management

  • [Critical] Are session tokens generated with a cryptographically secure random number generator?

  • [High] Are session cookies configured with the HttpOnly and Secure flags?

  • [High] Is there a secure log-out function that invalidates the session on the server?

  • [Medium] Do sessions time out after a reasonable period of inactivity?

Data Handling & Encryption

  • [Critical] Is all sensitive data encrypted in transit using TLS 1.2+?

  • [High] Is sensitive data encrypted at rest in the database and in backups?

  • [High] Are industry-standard encryption algorithms (e.g., AES-256) used?

  • [Medium] Are sensitive data or system details avoided in error messages?

Dependency Management

  • [High] Has an SCA tool been run to check for vulnerable third-party libraries?

  • [High] Are all dependencies up to their latest secure versions?

Logging & Monitoring

  • [Critical] Are secrets (passwords, API keys) excluded from all logs?

  • [Medium] Are security-relevant events (e.g., failed logins, access denials) logged?

Conclusion

Building secure software requires a deliberate and systematic effort. This is why your team needs a secure code review checklist. It provides structure, consistency, and a security-first focus to your development process. It transforms code review from a simple bug hunt into a powerful defense against attacks.

For the best results, combine the discipline of a powerful secure code review checklist with automated tools and the contextual understanding that only human reviewers can provide. This layered approach ensures you catch a wide range of issues, from simple mistakes to complex logic flaws. Begin integrating these principles and build your own secure code review checklist today. Your future self will thank you for the secure and resilient applications you create.

FAQs

1) What are the 7 steps to review code?

A standard secure code review process involves seven steps:

  1. Define review goals and scope.

  2. Gather the code and related artifacts.

  3. Run automated SAST/SCA tools for an initial scan.

  4. Perform a manual review using a checklist, focusing on high-risk areas.

  5. Document all findings clearly with actionable steps.

  6. Prioritize the documented issues based on risk.

  7. Remediate the issues and verify the fixes.

2) How to perform a secure code review?

To perform a secure code review, you should first define your objectives and scope, focusing on high-risk application areas. Then, use a checklist to guide your manual inspection, and supplement your review with SAST and SCA tools. Document your findings and follow up to ensure fixes are correctly implemented.

3) What is a code review checklist?

A secure code review checklist is a structured list of items that guides a reviewer. It ensures consistent and thorough coverage of critical security areas like input validation, authentication, and encryption, helping to prevent common vulnerabilities and avoid gaps in the review process.

4) What are SAST tools during code review?

SAST stands for Static Application Security Testing. These tools automatically scan an application's source code for known vulnerability patterns without running the code. Tools like PVS-Studio, Semgrep, or SonarQube can find potential issues such as SQL injection, buffer overflows, and insecure coding patterns early in development.

5) How long should a secure code review take per 1,000 LOC?

There isn't a strict time rule, as the duration depends on several factors. However, a general industry guideline for a manual review is between 1 to 4 hours per 1,000 lines of code (LOC).

Factors that influence this timing include:

  • Code Complexity: Complex business logic or convoluted code will take longer to analyze than simple, straightforward code.

  • Reviewer's Experience: A seasoned security professional will often be faster and more effective than someone new to code review.

  • Programming Language: Some languages and frameworks have more inherent security risks and require more scrutiny.

  • Scope and Depth: A quick check for the OWASP Top 10 vulnerabilities is much faster than a deep, architectural security review.

LLM & Gen AI

Shivam Agarwal

Featured image for an article on Code dependencies

Code Dependencies: What They Are and Why They Matter

Dependencies in code are like ingredients for a recipe. When baking a cake, you don't grow the wheat and grind your own flour; you purchase it ready-made. Similarly, developers use pre-written code packages, known as libraries or modules, to construct complex applications without writing every single line from scratch.

These pre-made components are dependencies—external or internal pieces of code your project needs to function correctly. Managing them properly impacts your application's quality, security, and performance. When you build software, you integrate these parts created by others, which introduces a reliance on that external code. Your project's success is tied to the quality and maintenance of these components.

This article provides a detailed look into software dependencies. We will cover what they are, the different types you will encounter, and why managing them is a critical skill for any engineering team. We will also present strategies and tools to handle them effectively.

What “Dependency” Really Means in Programming

In programming, a dependency is a piece of code that your project relies on to function. These are often external libraries or modules that provide specific functionality. Think of them as pre-built components you use to add features to your application.

Code dependency

In software development, it's useful to distinguish between the general concept of dependence and the concrete term dependency.

  • Dependence is the state of relying on an external component for your code to function. It describes the "need" itself.

  • A dependency is the actual component you are relying on, such as a specific library, package, or framework.

This dependence means a change in a dependency can affect your code. For instance, if a library you use is updated or contains a bug, it directly impacts your project because of this reliance. Recognizing this is a foundational principle in software construction.

Libraries, External Modules, and Internal Code

It's useful to differentiate between a few common terms:

  • Software Libraries: These are collections of pre-written code that developers can use. For example, a library like NumPy in Python might offer functions for complex mathematical calculations. You import the library and call its functions. 

  • External Modules: This is a similar concept. An external module is a self-contained unit of code that exists outside your primary project codebase. Package managers install these modules for you to use. A well-known example is React, which is used for building user interfaces. 

  • Internal Modular Code: These are dependencies within your own project. You might break your application into smaller, reusable modules. For instance, a userAuth.js module could be used by both the authentication and profile sections of your application, creating an internal dependency.

A Community Perspective

Developers often use analogies to explain this concept. One clear explanation comes from a Reddit user, who states: “Software dependencies are external things your program relies on to work. Most commonly this means other libraries.” This simple definition captures the core idea perfectly.

Another helpful analogy from the same discussion simplifies it further: “...you rely on someone else to do the actual work and you just depend on it.” This highlights the nature of using a dependency. You integrate its functionality without needing to build it yourself.

Types of Code Dependencies: An Organized Look

Dependencies come in several forms, each relevant at different stages of the development lifecycle. Understanding these types helps you manage your project's architecture and build process more effectively. Knowing what are dependencies in code involves recognizing these distinct categories.

Common Dependency Categories

Here is a look at the most common types of dependencies you will work with.

  • Library Dependencies: These are the most common type. They consist of third-party code you import to perform specific tasks. Examples include react for building user interfaces or pandas for data manipulation in Python.

  • External Modules: This is a broad term for any code outside your immediate project. It includes libraries, frameworks, and any other packages you pull into your tech stack from an external registry.

  • Internal (Modular) Dependencies: These exist inside your project's codebase. When you structure your application into distinct modules, one module might require another to function. This creates a dependency between internal parts of your code.

  • Build Dependencies: These are tools required to build or compile your project. They are not needed for the final application to run, but they are essential during the development and compilation phase. A code transpiler like Babel is a classic example.

  • Compile-time Dependencies: These are similar to build dependencies. They are necessary only when the code is being compiled. For example, a C++ project might depend on header files that are not needed once the executable is created.

  • Runtime Dependencies: These are required when the application is actually running. A database connector, for instance, is a runtime dependency. The application needs it to connect to the database and execute queries in the production environment.

Transitive Dependencies

A critical concept is the transitive or indirect dependency. These are the dependencies of your dependencies. If your project uses Library A, and Library A uses Library B, then your project has a transitive dependency on Library B.

It's useful to distinguish this from a runtime dependency, which is any component your application needs to execute correctly in a live environment. While the two concepts often overlap, they are not identical.

Practical Example

Imagine you're building a web application using Node.js:

  • Direct Dependency: You add a library called Auth-Master to your project to handle user logins. Auth-Master is a direct dependency.

  • Transitive Dependency: Auth-Master requires another small utility library, Token-Gen, to create secure session tokens. You didn't add Token-Gen yourself, but your project now depends on it transitively.

  • Runtime Dependency: For the application to function at all, it must be executed by the Node.js runtime environment. Node.js is a runtime dependency. In this case, both Auth-Master and Token-Gen are also runtime dependencies because they are needed when the application is running to manage logins.

This illustrates that a component (Token-Gen) can be both transitive and runtime. The key difference is that "transitive" describes how you acquired the dependency (indirectly), while "runtime" describes when you need it (during execution).

These can become complex and are a major source of security vulnerabilities and license conflicts. According to the 2025 Open Source Security and Risk Analysis (OSSRA) report, 64% of open source components in applications are transitive dependencies. This shows how quickly they can multiply within a project. The tech publication DEV also points out the importance of tracking external, internal, and transitive dependencies to maintain a healthy codebase.

Why Code Dependencies Matter (and Why You Should Care)

Effective dependency management is not just an administrative task; it is central to building reliable, secure, and high-performing software. Neglecting them can introduce significant risks into your project.

Imagine a team launching a new feature, only to have the entire application crash during peak hours. After a frantic investigation, the culprit was identified: an unpatched vulnerability in an old third-party library. A simple version update, made months ago by the library's author, would have prevented the entire outage. Examining what are dependencies in code shows their direct link to project health.

1. Code Quality & Maintenance

Understanding dependencies is fundamental to good software architecture. It helps you structure code logically and predict the impact of changes. When one part of the system is modified, knowing what depends on it prevents unexpected breakages.

As the software analysis platform CodeSee explains it: “When Module A requires … Module B … we say Module A has a dependency on Module B.” This simple statement forms the basis of dependency graphs, which visualize how different parts of your code are interconnected, making maintenance much more predictable.

2. Security

Dependencies are a primary vector for security vulnerabilities. When you import a library, you are also importing any security flaws it may contain. Malicious actors frequently target popular open-source libraries to launch widespread attacks.

The threat is significant. According to the 2025 OSSRA report, a staggering 86% of audited applications contained open source vulnerabilities. The National Institute of Standards and Technology (NIST) provides extensive guidance on software supply chain security, recommending continuous monitoring and validation of third-party components as a core practice. Properly managing your dependencies is your first line of defense.

3. Performance

The performance of your application is directly tied to its dependencies. A slow or resource-intensive library can become a bottleneck, degrading the user experience. Large dependencies can also increase your application's bundle size, leading to longer load times for web applications.

By analyzing your dependencies, you can identify which ones are contributing most to performance issues. Sometimes, replacing a heavy library with a more lightweight alternative or writing a custom solution can lead to significant performance gains. This optimization is impossible without a clear picture of your project's dependency tree.

4. Legal & Licensing

Every external dependency you use comes with a software license. These licenses dictate how you can use, modify, and distribute the code. Failing to comply with these terms can lead to serious legal consequences.

License compatibility is a major concern. For example, using a library with a "copyleft" license (like the GPL) in a proprietary commercial product may require you to open-source your own code. The 2025 OSSRA report found that 56% of audited applications had license conflicts, many of which arose from transitive dependencies. Tools mentioned by DEV are essential for tracking and ensuring license compliance.

Managing Code Dependencies Like a Pro

Given their impact, you need a systematic approach to managing dependencies. Modern development relies on a combination of powerful tools and established best practices to keep dependencies in check. Truly understanding what are dependencies in code means learning how to control them.

Managing Code Dependencies

a. Dependency Management Tools

Package managers are the foundation of modern dependency management. They automate the process of finding, installing, and updating libraries. Each major programming ecosystem has its own set of tools.

  • npm (Node.js): The default package manager for JavaScript. It manages packages listed in a package.json file.

  • pip (Python): Used to install and manage Python packages. It typically works with a requirements.txt file.

  • Maven / Gradle (Java): These are build automation tools that also handle dependency management for Java projects.

  • Yarn / pnpm: Alternatives to npm that offer improvements in performance and security for managing JavaScript packages.

These tools streamline the installation process and help resolve version conflicts between different libraries.

b. Virtual Environments

A virtual environment is an isolated directory that contains a specific version of a language interpreter and its own set of libraries. This practice prevents dependency conflicts between different projects on the same machine.

For example, Project A might need version 1.0 of a library, while Project B needs version 2.0. Without virtual environments, installing one would break the other. DEV details tools like pipenv and Poetry for Python, which create these isolated environments automatically. For Node.js, nvm (Node Version Manager) allows you to switch between different Node.js versions, each with its own global packages.

c. Semantic Versioning

Semantic Versioning (SemVer) is a versioning standard that provides meaning to version numbers. A version is specified as MAJOR.MINOR.PATCH.

  • MAJOR version change indicates an incompatible API change.

  • MINOR version change adds functionality in a backward-compatible manner.

  • PATCH version change makes backward-compatible bug fixes.

As noted by CodeSee, adhering to SemVer is crucial. It allows you to specify version ranges for your dependencies safely. For instance, you can configure your package manager to accept any new patch release automatically but require manual approval for a major version update that could break your code.

d. Visualization & Analysis Tools

For complex projects, it can be difficult to see the full dependency tree. This is where visualization and analysis tools come in.

  • Software Composition Analysis (SCA) Tools: These tools scan your project to identify all open-source components, including transitive dependencies. They check for known security vulnerabilities and potential license conflicts. The OWASP Dependency-Check project is a well-known open-source SCA tool.

  • Dependency Graph Visualizers: Tools like CodeSee's dependency maps can generate interactive diagrams of your codebase. These visualizations help you understand how modules interact and identify areas of high complexity or tight coupling.

e. Refactoring for Modularity

The best way to manage dependencies is to design a system with as few of them as needed. This involves writing modular code with clean interfaces. Principles like SOLID encourage loose coupling, where components are independent and interact through stable APIs.

A benefit of modular programming is that it makes code more reusable and easier to maintain. Research from educational resources on software design confirms that breaking down a system into independent modules improves readability and simplifies debugging. When you need to change one module, the impact on the rest of the system is minimized, which is a core goal of good dependency management.

Real-World Example in OOP

Object-Oriented Programming (OOP) provides a clear illustration of dependency principles. Improper dependencies between classes can make a system rigid and difficult to maintain. This example shows why thinking about what are dependencies in code is so important at the architectural level.

Imagine two classes in an HR system: Employee and HR.

Java
// A simple Employee class
public class Employee {
    private String employeeId;
    private String name;
    private double salary;

    // Constructor, getters, and setters
    public Employee(String employeeId, String name, double salary) {
        this.employeeId = employeeId;
        this.name = name;
        this.salary = salary;
    }

    public double getSalary() {
        return salary;
    }
}

// The HR class depends directly on the Employee class
public class HR {
    public void processPaycheck(Employee employee) {
        double salary = employee.getSalary();
        // ... logic to process paycheck
        System.out.println("Processing paycheck for amount: " + salary);
    }
}

In this case, the HR class has a direct dependency on the Employee class. If the Employee class changes—for example, if the getSalary() method is renamed or its return type changes—the HR class will break. This is a simple example of a direct dependency.

A better approach is to depend on abstractions, not concrete implementations. For instance, testing classes should only rely on the public interfaces of the classes they test. This principle limits breakage when internal implementation details change, making the codebase more resilient and maintainable. For scope and technique, see unit vs functional testing and regression vs unit testing.

Conclusion

Dependencies are an integral part of modern software development. They enable us to build powerful applications by standing on the shoulders of giants. However, this power comes with responsibility. A failure to manage dependencies is a failure to manage your project's quality, security, and performance.

By understanding the different types of dependencies, from external libraries to internal modules, you can make more informed architectural decisions. Using the right tools and best practices—like package managers, virtual environments, and SCA scanners—transforms dependency management from a chore into a strategic advantage. It leads to better code, safer deployments, and smoother collaboration. The central question of what are dependencies in code is one every developer must answer to build professional-grade software.

FAQ Section

1) What are examples of dependencies?

Dependencies include software libraries (e.g., Lodash), external modules (npm packages), internal shared utilities, test frameworks (a build dependency), and runtime libraries like database connectors.

2) What do you mean by dependencies?

Dependencies are external or internal pieces of code that your project requires to function correctly. Your code "depends" on them to execute its tasks.

3) What are the dependencies of a programming language?

These include its runtime environment (like an interpreter or compiler), its standard library of built-in functions, and its toolchain, which consists of package managers and build tools.

4) What are dependencies on a computer?

These are system-level libraries or packages an application needs to run. Examples include graphics drivers, system fonts like OpenSSL, or installed runtimes such as the Java Virtual Machine (JVM) or .NET Framework.

Shivam Agarwal

Figma Design To Code: Step-by-Step Guide 2025

Figma Design To Code: Step-by-Step Guide 2025

The gap between a finished design and functional code is a known friction point in product development. For non-coders, it’s a barrier. For busy frontend developers, it's a source of repetitive work that consumes valuable time. The process of translating a Figma design to code, while critical, is often manual and prone to error.

This article introduces the concept of Figma design to code automation. We will walk through how Dualite Alpha bridges the design-to-development gap. It offers a way to quickly turn static designs into usable, production-ready frontend code, directly in your browser.

Why “Figma Design to Code” Matters

UI prototyping is the stage where interactive mockups are created. The design handoff is the point where these approved designs are passed to developers for implementation. Dualite fits into this ecosystem by automating the handoff, turning a visual blueprint into a structural codebase.

The benefits are immediate and measurable.

  • Saves Time: Research shows that development can be significantly faster with automated systems. A study by Sparkbox found that using a design system made a simple form page 47% faster to develop versus coding it from scratch. This frees up developers to focus on complex logic.

  • Reduces Errors: Manual translation introduces human error. Automated conversion ensures visual and structural consistency between the Figma file and the initial codebase. According to Aufait UX, teams using design systems can reduce errors by as much as 60%.

  • Smoother Collaboration: Tools that automate code generation act as a common language between designers and developers. They reduce the back-and-forth communication that often plagues projects. Studies on designer-developer collaboration frequently point to communication issues as a primary challenge.

Why “Figma Design to Code” Matters


This approach helps both non-coders and frontend developers. It provides a direct path to creating responsive layouts and functional components, accelerating the entire development lifecycle.

Getting Started with Dualite Alpha

Dualite Alpha is a platform that handles the entire workflow from design to deployment. It operates within your browser, requiring no server storage for your projects. This enhances security and privacy.

Its core strengths are:

  • Direct Figma Integration: Dualite works with Figma without needing an extra plugin. You can connect your designs directly.

  • Automated Code Generation: The platform intelligently interprets Figma designs to produce clean, structured code.

  • Frontend Framework Support: It generates code for React, Tailwind CSS, and plain HTML/CSS, fitting into modern tech stacks.


Getting Started with Dualite Alpha


Dualite serves as a powerful accelerator for any team looking to improve its Figma design to code workflow.

Figma Design to Code: Step-by-Step Tutorial

The following tutorial breaks down the process of converting your designs into code. For a visual guide, the video below offers a complete masterclass, showing how to build a functional web application from a Figma file using Dualite Alpha. The demonstration covers building a login page, handling page redirection, making components functional, and ensuring responsiveness.


Step 1: Open Dualite and Connect Your Figma Account

First, go to dualite.dev and select "Try Dualite Now" to open the Dualite (Alpha) interface. Within the start screen, click on the Figma icon and then "Connect Figma." You will be prompted to authorize the connection via an oAuth window. It is crucial to select the Figma account that owns the design file you intend to use.

Open Dualite and Connect Your Figma Account


Open Dualite and Connect Your Figma Account


Open Dualite and Connect Your Figma Account


Step 2: Copy the Link to Your Figma Selection

In Figma, open your design file and select the specific Frame, Component, or Instance that you want to convert. Right-click on your selection, go to "Copy/Paste as," and choose "Copy link to selection."

Step 3: Import Your Figma Design into Dualite

Return to Dualite and paste the copied URL into the "Import from Figma" field. Click "Import." Dualite will process the link, and a preview of your design will appear along with a green checkmark to indicate that the design has been recognized.

Import Your Figma Design into Dualite


Import Your Figma Design into Dualite


Step 4: Confirm and Continue

Review the preview to ensure it accurately represents your selection. If everything looks correct, click "Continue with this design" to proceed.

Step 5: Select the Target Stack and Generate the Initial Build

In the "Framework" dropdown menu, choose your desired stack, such as React. Then, in the chat box, provide a simple instruction like, "Build this website based on the Figma file." Dualite will then parse the imported design and generate the working code along with a live preview.

Select the Target Stack and Generate the Initial Build


Step 6: Iterate and Refine with Chat Commands

You can make further changes to your design using short, conversational follow-ups in the chat. For instance, you can request to make the hero section responsive for mobile, turn a button into a link, or extract the navigation bar into a reusable component. This iterative chat feature is designed for making stepwise changes after the initial build.

Step 7: Inspect, Edit, and Export Your Code

You can switch between the "Preview" and "Code" views using the toggle at the top of the screen. This allows you to open files, tweak styles or logic, and save your changes directly within Dualite’s editor. When you are finished, you can download the code as a ZIP file to use it locally. Alternatively, you can push the code to GitHub with the built-in two-way sync, which allows you to import an existing repository, push changes, or create a new repository from your project.

Step 8: Deploy Your Website

Finally, to publish your site, click "Deploy" in the top-right corner and connect your Netlify account.

This is highly useful for teams that need to prototype quickly. It also strengthens collaboration between design and development by providing a shared, code-based foundation. Research from zeroheight shows that design-to-development handoff efficiency can increase by 50% with such systems.

Conclusion

Dualite simplifies the Figma design to code process. It provides a practical, efficient solution for turning visual concepts into tangible frontend code.

The platform benefits both designers and developers. It creates a bridge between roles, reducing friction and speeding up the development cycle. By adopting a hybrid approach—using generated code as a foundation and refining it—teams can gain a significant advantage in their workflow. 

The future of frontend development is about working smarter, and tools like Dualite are central to that objective. The efficiency of a Figma design to code workflow is a clear step forward. A focus on better tools will continue to improve the Figma design to code process. This makes the Figma design to code strategy a valuable one. For any team, improving the Figma design to code pipeline is a worthy goal.


FAQ Section

1) Can I convert Figma design to code? 

Yes. Tools like Dualite let you convert Figma designs into React, HTML/CSS, or Tailwind CSS code with a few clicks. Figma alone provides only basic CSS snippets, not full layouts or structure.

2) Can ChatGPT convert Figma design to code? 

Not directly. ChatGPT cannot parse Figma files. You can describe a design and ask for code suggestions, but it cannot generate accurate front-end layouts from actual Figma prototypes.

3) Does Figma provide code for design? 

Figma’s Dev Mode offers CSS and SVG snippets, but not full production-ready code. Most developers still hand-write the structure, style, and logic based on those hints.

4) What tool converts Figma to code? 

Dualite is one such tool that turns Figma designs into clean code quickly. Other tools exist, but users report mixed results—often fine for prototypes, but not always clean or maintainable.

Figma & No-code

Shivam Agarwal

Featured image for an article on Secure code review checklist

Secure Code Review Checklist for Developers

Writing secure code is non-negotiable in modern software development. A single vulnerability can lead to data breaches, system downtime, and a loss of user trust. The simplest, most effective fix is to catch these issues before they reach production. This is accomplished through a rigorous code review process, guided by a secure code review checklist.

A secure code review checklist is a structured set of guidelines and verification points used during the code review process. It ensures that developers consistently check for common security vulnerabilities and adhere to best practices. For instance, a checklist item might ask, "Is all user-supplied input validated and sanitized to prevent injection attacks (e.g., SQLi, XSS)?

This article provides a detailed guide to creating and using such a checklist, helping you build more resilient and trustworthy applications from the ground up. We will cover why a checklist is essential, how to prepare for a review, core items to include, and how to integrate automation to make the process efficient and repeatable.

TL;DR: Secure Code Review Checklist

A secure code review checklist is a structured guide to ensure code is free from common security flaws before reaching production. The core items include:

  • Input Validation – Validate and sanitize all user input on the server side.


  • Output Encoding – Use context-aware encoding to prevent XSS.


  • Authentication & Authorization – Enforce server-side checks, hash & salt passwords, follow least privilege.


  • Error Handling & Logging – Avoid leaking sensitive info, log security-relevant events without secrets.


  • Data Encryption – Encrypt data at rest and in transit using strong standards (TLS 1.2+, AES-256).


  • Session Management – Secure tokens, timeouts, HttpOnly & Secure cookies.


  • Dependency Management – Use SCA tools, keep libraries updated.


  • Logging & Monitoring – Track suspicious activity, monitor alerts, protect log files.


  • Threat Modeling – Continuously validate assumptions and attack vectors.


  • Secure Coding Practices – Follow OWASP, CERT, and language-specific standards.

Use this checklist during manual reviews, supported by automation (SAST/SCA tools), to catch vulnerabilities early, reduce costs, and standardize secure development practices.

Why Use a Secure Code Review Checklist?

Code quality and vulnerability assessment are two sides of the same coin. A checklist provides a systematic approach to both. It helps standardize the review process across your entire team, ensuring no critical security checks are overlooked. This is why we use a secure code review checklist.

The primary benefit is catching security issues early in the development lifecycle. Fixing a vulnerability during development is significantly less costly and time-consuming than patching it in production. According to a report by the Systems Sciences Institute at IBM, a bug found in production is six times more expensive to fix than one found during design and implementation.

Organizations like the Open Web Application Security Project (OWASP) provide extensive community-vetted resources that codify decades of security wisdom. A checklist helps you put this wisdom into practice. Even if the checklist items seem obvious, the act of using one frames the reviewer's mindset, focusing their attention specifically on security concerns. This focus alone significantly increases the likelihood of detecting vulnerabilities that might otherwise be missed.

  • Standardization: Ensures every piece of code gets the same security scrutiny.

  • Efficiency: Guides reviewers to the most critical areas quickly.

  • Early Detection: Finds and fixes flaws before they become major problems.

  • Knowledge Sharing: Acts as a teaching tool for junior developers.

Preparing Your Secure Code Review

A successful review starts before you look at a single line of code. Proper preparation ensures your efforts are focused and effective. Without a plan, reviews can become unstructured and miss critical risks.

Preparing Your Secure Code Review

Threat Modeling First

Before reviewing code, you must understand the application's potential threats. Threat modeling is a process where you identify security risks and potential vulnerabilities.

Ask questions like:

  • Where does the application handle sensitive data?

  • What are the entry points for user input?

  • How do different components authenticate with each other?

  • What external systems does the application trust?

This analysis helps you pinpoint high-risk areas of the codebase architecture that demand the most attention.

Define Objectives

Clarify the goals of the review. Are you hunting for specific bugs, verifying compliance with a security standard, or improving overall code quality? Defining your objectives helps focus the review and measure its success.

Set Scope

You do not have to review the entire codebase at once. Start with the most critical and high-risk code segments identified during threat modeling.

Focus initial efforts on:

  • Authentication and Authorization Logic: Code that handles user logins and permissions.

  • Session Management: Functions that create and manage user sessions.

  • Data Encryption Routines: Any code that encrypts or decrypts sensitive information.

  • Input Handling: Components that process data from users or external systems.

Gather the Right Tools and People

Assemble a review team with a good mix of skills. Include the developer who wrote the code, a security-minded developer, and, if possible, a dedicated security professional. This combination of perspectives provides a more thorough assessment.

Equip the team with the proper tools, including access to the project's documentation and specialized software. For instance, static analysis tools can automatically scan for vulnerabilities. For threat modeling, you might use OWASP Threat Dragon, and for automation, a platform like GitHub Actions can integrate security checks directly into the workflow.

Core Secure Code Review Checklist Items

This section contains the fundamental items that should be part of any review. Each one targets a common area where security vulnerabilities appear.

1) Input Validation

Attackers exploit applications by sending malicious or unexpected input. Proper input validation is your first line of defense.

  • Validate on the Server Side: Never trust client-side validation alone. Attackers can easily bypass it. Always re-validate all inputs on the server.

  • Classify Data: Separate data into trusted (from internal systems) and untrusted (from users or external APIs) sources. Scrutinize all untrusted data.

  • Centralize Routines: Create and use a single, well-tested library for all input validation. This avoids duplicated effort and inconsistent logic.

  • Canonicalize Inputs: Convert all input into a standard, simplified form before processing. For example, enforce UTF-8 encoding to prevent encoding-based attacks.

2) Output Encoding

Output encoding prevents attackers from injecting malicious scripts into the content sent to a user's browser. This is the primary defense against Cross-Site Scripting (XSS).

  • Encode on the Server: Always perform output encoding on the server, just before sending it to the client.

  • Use Context-Aware Encoding: The method of encoding depends on where the data will be placed. Use specific routines for HTML bodies, HTML attributes, JavaScript, and CSS.

  • Utilize Safe Libraries: Employ well-tested libraries provided by your framework to handle encoding. Avoid writing your own encoding functions.

3) Authentication & Authorization

Authentication confirms a user's identity, while authorization determines what they are allowed to do. Flaws in these areas can give attackers complete control.

  • Enforce on the Server: All authentication and authorization checks must occur on the server.

  • Use Tested Services: Whenever possible, integrate with established identity providers or use your framework's built-in authentication mechanisms.

  • Centralize Logic: Place all authorization checks in a single, reusable location to ensure consistency.

  • Hash and Salt Passwords: Never store passwords in plain text. Use a strong, adaptive hashing algorithm like Argon2 or bcrypt with a unique salt for each user.

  • Use Vague Error Messages: On login pages, use generic messages like "Invalid username or password." Specific messages ("User not found") help attackers identify valid accounts.

  • Secure External Credentials: Protect API keys, database credentials, and other secrets. Store them outside of your codebase using a secrets management tool.

4) Error Handling & Logging

Proper error handling prevents your application from leaking sensitive information when something goes wrong.

  • Avoid Sensitive Data in Errors: Error messages shown to users should never contain stack traces, database queries, or other internal system details.

  • Log Sufficient Context: Your internal logs should contain enough information for debugging, such as a timestamp, the affected user ID (if applicable), and the error details.

  • Do Not Log Secrets: Ensure that passwords, API keys, session tokens, and other sensitive data are never written to logs.

5) Data Encryption

Data must be protected both when it is stored (at rest) and when it is being transmitted (in transit).

  • Encrypt Data in Transit: Use Transport Layer Security (TLS) 1.2 or higher for all communication between the client and server.

  • Encrypt Data at Rest: Protect sensitive data stored in databases, files, or backups.

  • Use Proven Standards: Implement strong, industry-accepted encryption algorithms like AES-256. For databases, use features like Transparent Data Encryption (TDE) or column-level encryption for the most sensitive fields.

6) Session Management & Access Controls

Once a user is authenticated, their session must be managed securely. Access controls ensure users can only perform actions they are authorized for.

  • Secure Session Tokens: Generate long, random, and unpredictable session identifiers. Do not include any sensitive information within the token itself.

  • Expire Sessions Properly: Sessions should time out after a reasonable period of inactivity. Provide users with a clear log-out function that invalidates the session on the server.

  • Guard Cookies: Set the Secure and HttpOnly flags on session cookies. This prevents them from being sent over unencrypted connections or accessed by client-side scripts.

  • Enforce Least Privilege: Users and system components should only have the minimum permissions necessary to perform their functions.

7) Dependency Management

Modern applications are built on a foundation of third-party libraries and frameworks. A vulnerability in one of these dependencies is a vulnerability in your application.

  • Use Software Composition Analysis (SCA) Tools: These tools scan your project to identify third-party components with known vulnerabilities.

  • Keep Dependencies Updated: Regularly update your dependencies to their latest stable versions. Studies from organizations like Snyk regularly show that a majority of open-source vulnerabilities have fixes available. A 2025 Snyk report showed projects using automated dependency checkers fix vulnerabilities 40% faster.

8) Logging & Monitoring

Secure logging and monitoring help you detect and respond to attacks in real-time.

  • Track Suspicious Activity: Log security-sensitive events such as failed login attempts, access-denied errors, and changes to permissions.

  • Monitor Logs: Use automated tools to monitor logs for patterns that could indicate an attack. Set up alerts for high-priority events.

  • Protect Your Logs: Ensure that log files are protected from unauthorized access or modification.

9) Threat Modeling

During the review, continuously refer back to your threat model. This helps maintain focus on the most likely attack vectors.

  • Review Data Flows: Trace how data moves through the application.

  • Validate Trust Boundaries: Pay close attention to points where the application interacts with external systems or receives user input.

  • Question Assumptions: Could an attacker manipulate this data flow? Could they inject code or bypass a security control?

10) Code Readability & Secure Coding Standards

Clean, readable code is easier to secure. Ambiguous or overly complex logic can hide subtle security flaws.

  • Write Clear Code: Use meaningful variable names, add comments where necessary, and keep functions short and focused.

  • Use Coding Standards: Adhere to established secure coding standards for your language. Some great resources are the OWASP Secure Coding Practices, the SEI CERT Coding Standards, and language-specific guides.

11) Secure Data Storage

How and where you store sensitive data is critical. This goes beyond just encrypting the database.

  • Protect Backups: Ensure that database backups are encrypted and stored in a secure location with restricted access.

  • Sanitize Data: When using production data in testing or development environments, make sure to sanitize it to remove any real user information.

  • Limit Data Retention: Only store sensitive data for as long as it is absolutely necessary. Implement and follow a clear data retention policy.

Automated Tools to Boost Your Checklist

Manual reviews are essential for understanding context and business logic, but they can be slow and prone to human error. For smaller teams, free and open-source tools like SonarQube, Snyk, and Semgrep perfectly complement a manual secure code review checklist by catching common issues quickly and consistently.

Integrate SAST and SCA into CI/CD

Integrate Static Application Security Testing (SAST) and Software Composition Analysis (SCA) tools directly into your Continuous Integration/Continuous Deployment (CI/CD) pipeline. This automates the initial security scan on every code commit.

  • SAST Tools: These tools analyze your source code without executing it. They are excellent at finding vulnerabilities like SQL injection, buffer overflows, and insecure configurations.

  • SCA Tools: These tools identify all the open-source libraries in your codebase and check them against a database of known vulnerabilities.

Configure Security-Focused Rules

Configure your automated tools to enforce specific security rules tied to standards like OWASP Top 10 or the SEI CERT standards. This ensures that the automated checks are directly connected to your security requirements.

Popular Static Analysis Tools

Several tools can help automate parts of your review:

  • PVS-Studio: A static analyzer for C, C++, C#, and Java code.

  • Semgrep: A fast, open-source static analysis tool that supports many languages and allows for custom rules.

  • SonarQube: An open-platform to manage code quality, which includes security analysis features.

Automated code review cycle

Running The Review

With your preparation complete and checklist in hand, it is time to conduct the review. A structured approach makes the process more efficient and less draining for the participants.

Timebox Your Sessions

Limit each review session to about 60-90 minutes. Longer sessions can lead to fatigue and reduced focus, making it more likely that reviewers will miss important issues. It is better to have multiple short, focused sessions than one long, exhaustive one.

Apply the Checklist Systematically

Work through your checklist steadily. Start with the high-risk areas you identified during threat modeling. Use a combination of automated tools and manual inspection.

  1. Run Automated Scans First: Let SAST and SCA tools perform an initial pass to catch low-hanging fruit.

  2. Manually Inspect High-Risk Code: Use your expertise and the checklist to examine authentication, authorization, and data handling logic.

  3. Validate Business Logic: Check for flaws in the application's logic that an automated tool would miss.

Track Metrics for Improvement

To make your process repeatable and measurable, track key metrics.

Metric

Description

Purpose

Tracking Tools

Inspection Rate

Lines of code reviewed per hour.

Helps in planning future reviews.

Code review systems (Crucible, Gerrit) or custom dashboards (Grafana, Tableau) pulling data from version control.

Defect Density

Number of defects found per 1,000 lines of code.

Measures code quality over time.

Static analysis tools (SonarQube) and issue trackers (Jira, GitHub Issues).

Time to Remediate

Time taken to fix a reported issue.

Measures the efficiency of your response process.

Issue trackers like Jira, GitHub Issues, Asana, or service desk software like Zendesk.

Keeping Your Process Up to Date

Security is not a one-time activity. The threat environment is constantly changing, and your review process must adapt. An effective secure code review checklist is a living document.

Update for New Threats

Regularly review and update your checklist to include checks for new types of vulnerabilities. Stay informed by following security publications from organizations like NIST and OWASP. When a new major vulnerability is disclosed (like Log4Shell), update your checklist to include specific checks for it.

Build a Security-First Mindset

The ultimate goal is to create a team where everyone thinks about security. Use the code review process as an educational opportunity. When you find a vulnerability, explain the risk and the correct way to fix it. This continuous training builds a stronger, more security-aware engineering team.

Sample “Starter” Checklist

Here is a starter secure code review checklist based on the principles discussed. You can use this as a foundation and customize it for your specific tech stack and application. This is structured in a format you can use in a GitHub pull request template.

For a more detailed baseline, the OWASP Code Review Guide and the associated Quick Reference Guide are excellent resources.

Input Validation

  • [Critical] Is the application protected against injection attacks (SQLi, XSS, Command Injection)?

  • [Critical] Is all untrusted input validated on the server side?

  • [High] Is input checked for length, type, and format?

  • [Medium] Is a centralized input validation routine used?

Authentication & Authorization

  • [Critical] Are all sensitive endpoints protected with server-side authentication checks?

  • [Critical] Are passwords hashed using a strong, salted algorithm (e.g., Argon2, bcrypt)?

  • [Critical] Are authorization checks performed based on the user's role and permissions, not on incoming parameters?

  • [High] Are account lockout mechanisms in place to prevent brute-force attacks?

  • [High] Does the principle of least privilege apply to all user roles?

Session Management

  • [Critical] Are session tokens generated with a cryptographically secure random number generator?

  • [High] Are session cookies configured with the HttpOnly and Secure flags?

  • [High] Is there a secure log-out function that invalidates the session on the server?

  • [Medium] Do sessions time out after a reasonable period of inactivity?

Data Handling & Encryption

  • [Critical] Is all sensitive data encrypted in transit using TLS 1.2+?

  • [High] Is sensitive data encrypted at rest in the database and in backups?

  • [High] Are industry-standard encryption algorithms (e.g., AES-256) used?

  • [Medium] Are sensitive data or system details avoided in error messages?

Dependency Management

  • [High] Has an SCA tool been run to check for vulnerable third-party libraries?

  • [High] Are all dependencies up to their latest secure versions?

Logging & Monitoring

  • [Critical] Are secrets (passwords, API keys) excluded from all logs?

  • [Medium] Are security-relevant events (e.g., failed logins, access denials) logged?

Conclusion

Building secure software requires a deliberate and systematic effort. This is why your team needs a secure code review checklist. It provides structure, consistency, and a security-first focus to your development process. It transforms code review from a simple bug hunt into a powerful defense against attacks.

For the best results, combine the discipline of a powerful secure code review checklist with automated tools and the contextual understanding that only human reviewers can provide. This layered approach ensures you catch a wide range of issues, from simple mistakes to complex logic flaws. Begin integrating these principles and build your own secure code review checklist today. Your future self will thank you for the secure and resilient applications you create.

FAQs

1) What are the 7 steps to review code?

A standard secure code review process involves seven steps:

  1. Define review goals and scope.

  2. Gather the code and related artifacts.

  3. Run automated SAST/SCA tools for an initial scan.

  4. Perform a manual review using a checklist, focusing on high-risk areas.

  5. Document all findings clearly with actionable steps.

  6. Prioritize the documented issues based on risk.

  7. Remediate the issues and verify the fixes.

2) How to perform a secure code review?

To perform a secure code review, you should first define your objectives and scope, focusing on high-risk application areas. Then, use a checklist to guide your manual inspection, and supplement your review with SAST and SCA tools. Document your findings and follow up to ensure fixes are correctly implemented.

3) What is a code review checklist?

A secure code review checklist is a structured list of items that guides a reviewer. It ensures consistent and thorough coverage of critical security areas like input validation, authentication, and encryption, helping to prevent common vulnerabilities and avoid gaps in the review process.

4) What are SAST tools during code review?

SAST stands for Static Application Security Testing. These tools automatically scan an application's source code for known vulnerability patterns without running the code. Tools like PVS-Studio, Semgrep, or SonarQube can find potential issues such as SQL injection, buffer overflows, and insecure coding patterns early in development.

5) How long should a secure code review take per 1,000 LOC?

There isn't a strict time rule, as the duration depends on several factors. However, a general industry guideline for a manual review is between 1 to 4 hours per 1,000 lines of code (LOC).

Factors that influence this timing include:

  • Code Complexity: Complex business logic or convoluted code will take longer to analyze than simple, straightforward code.

  • Reviewer's Experience: A seasoned security professional will often be faster and more effective than someone new to code review.

  • Programming Language: Some languages and frameworks have more inherent security risks and require more scrutiny.

  • Scope and Depth: A quick check for the OWASP Top 10 vulnerabilities is much faster than a deep, architectural security review.

LLM & Gen AI

Shivam Agarwal

Featured image for an article on Code dependencies

Code Dependencies: What They Are and Why They Matter

Dependencies in code are like ingredients for a recipe. When baking a cake, you don't grow the wheat and grind your own flour; you purchase it ready-made. Similarly, developers use pre-written code packages, known as libraries or modules, to construct complex applications without writing every single line from scratch.

These pre-made components are dependencies—external or internal pieces of code your project needs to function correctly. Managing them properly impacts your application's quality, security, and performance. When you build software, you integrate these parts created by others, which introduces a reliance on that external code. Your project's success is tied to the quality and maintenance of these components.

This article provides a detailed look into software dependencies. We will cover what they are, the different types you will encounter, and why managing them is a critical skill for any engineering team. We will also present strategies and tools to handle them effectively.

What “Dependency” Really Means in Programming

In programming, a dependency is a piece of code that your project relies on to function. These are often external libraries or modules that provide specific functionality. Think of them as pre-built components you use to add features to your application.

Code dependency

In software development, it's useful to distinguish between the general concept of dependence and the concrete term dependency.

  • Dependence is the state of relying on an external component for your code to function. It describes the "need" itself.

  • A dependency is the actual component you are relying on, such as a specific library, package, or framework.

This dependence means a change in a dependency can affect your code. For instance, if a library you use is updated or contains a bug, it directly impacts your project because of this reliance. Recognizing this is a foundational principle in software construction.

Libraries, External Modules, and Internal Code

It's useful to differentiate between a few common terms:

  • Software Libraries: These are collections of pre-written code that developers can use. For example, a library like NumPy in Python might offer functions for complex mathematical calculations. You import the library and call its functions. 

  • External Modules: This is a similar concept. An external module is a self-contained unit of code that exists outside your primary project codebase. Package managers install these modules for you to use. A well-known example is React, which is used for building user interfaces. 

  • Internal Modular Code: These are dependencies within your own project. You might break your application into smaller, reusable modules. For instance, a userAuth.js module could be used by both the authentication and profile sections of your application, creating an internal dependency.

A Community Perspective

Developers often use analogies to explain this concept. One clear explanation comes from a Reddit user, who states: “Software dependencies are external things your program relies on to work. Most commonly this means other libraries.” This simple definition captures the core idea perfectly.

Another helpful analogy from the same discussion simplifies it further: “...you rely on someone else to do the actual work and you just depend on it.” This highlights the nature of using a dependency. You integrate its functionality without needing to build it yourself.

Types of Code Dependencies: An Organized Look

Dependencies come in several forms, each relevant at different stages of the development lifecycle. Understanding these types helps you manage your project's architecture and build process more effectively. Knowing what are dependencies in code involves recognizing these distinct categories.

Common Dependency Categories

Here is a look at the most common types of dependencies you will work with.

  • Library Dependencies: These are the most common type. They consist of third-party code you import to perform specific tasks. Examples include react for building user interfaces or pandas for data manipulation in Python.

  • External Modules: This is a broad term for any code outside your immediate project. It includes libraries, frameworks, and any other packages you pull into your tech stack from an external registry.

  • Internal (Modular) Dependencies: These exist inside your project's codebase. When you structure your application into distinct modules, one module might require another to function. This creates a dependency between internal parts of your code.

  • Build Dependencies: These are tools required to build or compile your project. They are not needed for the final application to run, but they are essential during the development and compilation phase. A code transpiler like Babel is a classic example.

  • Compile-time Dependencies: These are similar to build dependencies. They are necessary only when the code is being compiled. For example, a C++ project might depend on header files that are not needed once the executable is created.

  • Runtime Dependencies: These are required when the application is actually running. A database connector, for instance, is a runtime dependency. The application needs it to connect to the database and execute queries in the production environment.

Transitive Dependencies

A critical concept is the transitive or indirect dependency. These are the dependencies of your dependencies. If your project uses Library A, and Library A uses Library B, then your project has a transitive dependency on Library B.

It's useful to distinguish this from a runtime dependency, which is any component your application needs to execute correctly in a live environment. While the two concepts often overlap, they are not identical.

Practical Example

Imagine you're building a web application using Node.js:

  • Direct Dependency: You add a library called Auth-Master to your project to handle user logins. Auth-Master is a direct dependency.

  • Transitive Dependency: Auth-Master requires another small utility library, Token-Gen, to create secure session tokens. You didn't add Token-Gen yourself, but your project now depends on it transitively.

  • Runtime Dependency: For the application to function at all, it must be executed by the Node.js runtime environment. Node.js is a runtime dependency. In this case, both Auth-Master and Token-Gen are also runtime dependencies because they are needed when the application is running to manage logins.

This illustrates that a component (Token-Gen) can be both transitive and runtime. The key difference is that "transitive" describes how you acquired the dependency (indirectly), while "runtime" describes when you need it (during execution).

These can become complex and are a major source of security vulnerabilities and license conflicts. According to the 2025 Open Source Security and Risk Analysis (OSSRA) report, 64% of open source components in applications are transitive dependencies. This shows how quickly they can multiply within a project. The tech publication DEV also points out the importance of tracking external, internal, and transitive dependencies to maintain a healthy codebase.

Why Code Dependencies Matter (and Why You Should Care)

Effective dependency management is not just an administrative task; it is central to building reliable, secure, and high-performing software. Neglecting them can introduce significant risks into your project.

Imagine a team launching a new feature, only to have the entire application crash during peak hours. After a frantic investigation, the culprit was identified: an unpatched vulnerability in an old third-party library. A simple version update, made months ago by the library's author, would have prevented the entire outage. Examining what are dependencies in code shows their direct link to project health.

1. Code Quality & Maintenance

Understanding dependencies is fundamental to good software architecture. It helps you structure code logically and predict the impact of changes. When one part of the system is modified, knowing what depends on it prevents unexpected breakages.

As the software analysis platform CodeSee explains it: “When Module A requires … Module B … we say Module A has a dependency on Module B.” This simple statement forms the basis of dependency graphs, which visualize how different parts of your code are interconnected, making maintenance much more predictable.

2. Security

Dependencies are a primary vector for security vulnerabilities. When you import a library, you are also importing any security flaws it may contain. Malicious actors frequently target popular open-source libraries to launch widespread attacks.

The threat is significant. According to the 2025 OSSRA report, a staggering 86% of audited applications contained open source vulnerabilities. The National Institute of Standards and Technology (NIST) provides extensive guidance on software supply chain security, recommending continuous monitoring and validation of third-party components as a core practice. Properly managing your dependencies is your first line of defense.

3. Performance

The performance of your application is directly tied to its dependencies. A slow or resource-intensive library can become a bottleneck, degrading the user experience. Large dependencies can also increase your application's bundle size, leading to longer load times for web applications.

By analyzing your dependencies, you can identify which ones are contributing most to performance issues. Sometimes, replacing a heavy library with a more lightweight alternative or writing a custom solution can lead to significant performance gains. This optimization is impossible without a clear picture of your project's dependency tree.

4. Legal & Licensing

Every external dependency you use comes with a software license. These licenses dictate how you can use, modify, and distribute the code. Failing to comply with these terms can lead to serious legal consequences.

License compatibility is a major concern. For example, using a library with a "copyleft" license (like the GPL) in a proprietary commercial product may require you to open-source your own code. The 2025 OSSRA report found that 56% of audited applications had license conflicts, many of which arose from transitive dependencies. Tools mentioned by DEV are essential for tracking and ensuring license compliance.

Managing Code Dependencies Like a Pro

Given their impact, you need a systematic approach to managing dependencies. Modern development relies on a combination of powerful tools and established best practices to keep dependencies in check. Truly understanding what are dependencies in code means learning how to control them.

Managing Code Dependencies

a. Dependency Management Tools

Package managers are the foundation of modern dependency management. They automate the process of finding, installing, and updating libraries. Each major programming ecosystem has its own set of tools.

  • npm (Node.js): The default package manager for JavaScript. It manages packages listed in a package.json file.

  • pip (Python): Used to install and manage Python packages. It typically works with a requirements.txt file.

  • Maven / Gradle (Java): These are build automation tools that also handle dependency management for Java projects.

  • Yarn / pnpm: Alternatives to npm that offer improvements in performance and security for managing JavaScript packages.

These tools streamline the installation process and help resolve version conflicts between different libraries.

b. Virtual Environments

A virtual environment is an isolated directory that contains a specific version of a language interpreter and its own set of libraries. This practice prevents dependency conflicts between different projects on the same machine.

For example, Project A might need version 1.0 of a library, while Project B needs version 2.0. Without virtual environments, installing one would break the other. DEV details tools like pipenv and Poetry for Python, which create these isolated environments automatically. For Node.js, nvm (Node Version Manager) allows you to switch between different Node.js versions, each with its own global packages.

c. Semantic Versioning

Semantic Versioning (SemVer) is a versioning standard that provides meaning to version numbers. A version is specified as MAJOR.MINOR.PATCH.

  • MAJOR version change indicates an incompatible API change.

  • MINOR version change adds functionality in a backward-compatible manner.

  • PATCH version change makes backward-compatible bug fixes.

As noted by CodeSee, adhering to SemVer is crucial. It allows you to specify version ranges for your dependencies safely. For instance, you can configure your package manager to accept any new patch release automatically but require manual approval for a major version update that could break your code.

d. Visualization & Analysis Tools

For complex projects, it can be difficult to see the full dependency tree. This is where visualization and analysis tools come in.

  • Software Composition Analysis (SCA) Tools: These tools scan your project to identify all open-source components, including transitive dependencies. They check for known security vulnerabilities and potential license conflicts. The OWASP Dependency-Check project is a well-known open-source SCA tool.

  • Dependency Graph Visualizers: Tools like CodeSee's dependency maps can generate interactive diagrams of your codebase. These visualizations help you understand how modules interact and identify areas of high complexity or tight coupling.

e. Refactoring for Modularity

The best way to manage dependencies is to design a system with as few of them as needed. This involves writing modular code with clean interfaces. Principles like SOLID encourage loose coupling, where components are independent and interact through stable APIs.

A benefit of modular programming is that it makes code more reusable and easier to maintain. Research from educational resources on software design confirms that breaking down a system into independent modules improves readability and simplifies debugging. When you need to change one module, the impact on the rest of the system is minimized, which is a core goal of good dependency management.

Real-World Example in OOP

Object-Oriented Programming (OOP) provides a clear illustration of dependency principles. Improper dependencies between classes can make a system rigid and difficult to maintain. This example shows why thinking about what are dependencies in code is so important at the architectural level.

Imagine two classes in an HR system: Employee and HR.

Java
// A simple Employee class
public class Employee {
    private String employeeId;
    private String name;
    private double salary;

    // Constructor, getters, and setters
    public Employee(String employeeId, String name, double salary) {
        this.employeeId = employeeId;
        this.name = name;
        this.salary = salary;
    }

    public double getSalary() {
        return salary;
    }
}

// The HR class depends directly on the Employee class
public class HR {
    public void processPaycheck(Employee employee) {
        double salary = employee.getSalary();
        // ... logic to process paycheck
        System.out.println("Processing paycheck for amount: " + salary);
    }
}

In this case, the HR class has a direct dependency on the Employee class. If the Employee class changes—for example, if the getSalary() method is renamed or its return type changes—the HR class will break. This is a simple example of a direct dependency.

A better approach is to depend on abstractions, not concrete implementations. For instance, testing classes should only rely on the public interfaces of the classes they test. This principle limits breakage when internal implementation details change, making the codebase more resilient and maintainable. For scope and technique, see unit vs functional testing and regression vs unit testing.

Conclusion

Dependencies are an integral part of modern software development. They enable us to build powerful applications by standing on the shoulders of giants. However, this power comes with responsibility. A failure to manage dependencies is a failure to manage your project's quality, security, and performance.

By understanding the different types of dependencies, from external libraries to internal modules, you can make more informed architectural decisions. Using the right tools and best practices—like package managers, virtual environments, and SCA scanners—transforms dependency management from a chore into a strategic advantage. It leads to better code, safer deployments, and smoother collaboration. The central question of what are dependencies in code is one every developer must answer to build professional-grade software.

FAQ Section

1) What are examples of dependencies?

Dependencies include software libraries (e.g., Lodash), external modules (npm packages), internal shared utilities, test frameworks (a build dependency), and runtime libraries like database connectors.

2) What do you mean by dependencies?

Dependencies are external or internal pieces of code that your project requires to function correctly. Your code "depends" on them to execute its tasks.

3) What are the dependencies of a programming language?

These include its runtime environment (like an interpreter or compiler), its standard library of built-in functions, and its toolchain, which consists of package managers and build tools.

4) What are dependencies on a computer?

These are system-level libraries or packages an application needs to run. Examples include graphics drivers, system fonts like OpenSSL, or installed runtimes such as the Java Virtual Machine (JVM) or .NET Framework.

Shivam Agarwal

Featured image for an article on Visual scripting

Visual Scripting: Definition, Benefits, and Examples

Imagine building application logic like assembling a flowchart. You connect boxes and arrows on a screen, defining behavior and flow without writing a single line of traditional code. This node-based, drag-and-drop approach is the foundation of a powerful method that is changing how teams build interactive experiences. This brings us to the core question: what is visual scripting?

For developers, tech leads, and engineering teams, understanding this approach is vital. It offers a way to accelerate prototyping, improve collaboration between technical and non-technical staff, and automate workflows. It represents a significant shift in how we can structure and visualize computational logic, making it an essential tool in modern development, from game creation to interactive design.

What Is Visual Scripting?

At its heart, visual scripting is a method of programming that lets you construct application logic using a graphical interface instead of text-based code. Users manipulate graphical elements—called nodes or blocks—and connect them to create a flow of actions and decisions.

Each node represents a specific function, event, variable, or control flow statement. For example, one node might get a character’s position, another might check for user input, and a third could trigger an animation. You connect these nodes with wires or lines, dictating the sequence and logic of operations in a clear, visual manner.

Visual scripting

This method provides an abstraction layer over conventional programming. It allows creators to focus on the logic and behavior of their application without getting bogged down by the syntax of a specific programming language. It is a practical answer to what is visual scripting.

How Visual Scripting Works

The mechanics of visual scripting are straightforward and intuitive. The process typically involves a few simple steps. You start by dragging nodes or blocks from a library onto a canvas. Then, you connect these nodes to map out the logical flow of your program.

  • Nodes: These are the basic building blocks. They can represent anything from a mathematical operation (add, subtract) to a complex action (play sound, move object).

  • Wires: These are the connectors that establish relationships between nodes. They direct the flow of data and execution from one node to the next.

  • Graphs: The entire canvas of connected nodes is called a graph. This graph is a visual representation of a script or a piece of your codebase architecture.

Behind the scenes, this visual graph is translated into machine-readable code. This translation layer converts the node-based logic into a language that the underlying engine can execute, such as C++ or C#. This means you are still programming, just through a different interface.

Many popular game engines and development toolchains feature robust visual scripting systems.

  • Unreal Engine’s Blueprints is a premier example, deeply integrated into the engine and best for game devs building complex interactions visually

  • Unity’s Visual Scripting (formerly known as Bolt) offers similar functionality and is best for teams mixing coders and non-coders; it was made a free, standard part of the engine in 2020.

Visual scripting mechanics and tools

These tools demonstrate how visual systems can coexist with and complement traditional code within a professional tech stack.

Why It Works: The Benefits for Engineering Teams

Understanding the advantages helps clarify the utility of visual scripting. It introduces efficiency and accessibility into the development process. The benefits directly address common production bottlenecks.

  • Accessible Interface: The graphical approach lowers the barrier to entry. Designers, artists, and other non-programmers can quickly contribute to the project’s logic without needing to learn complex syntax. This makes it a powerful tool for teams with varied technical skills.

  • Speed & Prototyping: Visual scripting excels at rapid iteration. You can build and test ideas, create proof-of-concepts, and produce functional demos much faster than with traditional coding. This speed is invaluable for validating concepts in early development stages.

  • Reduced Syntax Errors & Complexity: Because you work with pre-defined nodes, typographical and syntactical mistakes are nearly eliminated. This allows you to concentrate on the logic itself rather than debugging missing semicolons or mismatched brackets. The visual flow simplifies the representation of program logic.

  • Better Collaboration: This method acts as a common language between developers and non-technical team members.  A designer can create a UI flow visually, and a programmer can then inspect the underlying graph or even convert it to code for optimization. This shared workspace improves communication and integration.

  • Code Scaffold & Boilerplate: Visual tools can scaffold logical structures very quickly. You can generate the basic architecture for a system visually and then transition to text-based code to refine performance-critical parts. This saves time writing repetitive boilerplate code.

Drawbacks and Limitations to Consider

Despite its benefits, visual scripting is not a universal solution. Engineering teams must be aware of its limitations to apply it effectively and avoid creating future technical debt.

  • Scalability & Maintenance Issues: As logic becomes more complex, visual graphs can turn into a tangled web of nodes and wires, often called a "spaghetti graph." These large, intricate graphs are difficult to debug, refactor, and maintain over the long term. Reading and modifying a massive visual script is often less efficient than working with well-structured text code.

  • Performance Concerns: Visual scripting often introduces a small performance overhead compared to handwritten code. For most tasks, this difference is negligible. But for performance-critical systems—like core gameplay mechanics or high-frequency data processing—this overhead can become a significant issue.

  • Refactoring Constraints: Automated refactoring tools for visual scripts are less mature than those for text-based languages. Restructuring or cleaning up a complex visual graph is largely a manual process, which can be time-consuming and prone to error.

  • Ideal Use Cases Only: It is best seen as an ancillary tool within a larger development toolset.  It is perfect for certain tasks, such as UI logic, state machines, or simple event handling. However, it is not the right choice for building the entire backbone of a complex software system.

Visual Scripting: Real-World Developer Perspectives

To ground this discussion in practical experience, consider what developers actively working in the field have to say. Conversations on platforms like Reddit offer candid insights into how teams integrate these tools.

One developer highlights its value for initial builds but points out the need to transition later:

“We use it during the prototyping phase... we generally tend to remove most of the visual scripting during production to allow for more optimization and refactoring options in the long run.”

This sentiment is common. The tool helps teams validate ideas quickly before committing to a production-ready codebase.

Another developer offers a warning on growing complexity:

“Visual scripting becomes a big problem when the scope gets larger – reading through code is much easier than trying to scroll around to see which wire is going where.”

This quote speaks directly to the scalability and maintenance challenges mentioned earlier.

A balanced view treats it as a specialized instrument:

“Visual scripting is the microwave oven of the gamedev toolset... excel in very specific situations and require a fair bit of knowledge on how to actually use them correctly.”

This analogy correctly positions it as one tool among many, not a complete replacement for a traditional kitchen.

Finally, a developer points to its strength in empowering designers to make content adjustments:

“It is faster to implement... your system becomes highly extendable... can be used by the designer.”

This ability for non-programmers to iterate on logic is a significant production benefit. These perspectives help answer the question of what is visual scripting in a practical context.

Examples and Use Cases

The application of visual scripting extends across various domains, with game development being the most prominent. Leading engines provide first-class support for this workflow.

  • Unity (Visual Scripting): Since Unity acquired Bolt in 2020 and integrated it as a free package, its visual scripting tool has become a core part of the ecosystem. It allows teams to create logic for everything from character controllers to UI management directly within the editor. The question of what is visual scripting is often answered by pointing to Unity's implementation.

  • Unreal Engine (Blueprints): Blueprints are arguably the most famous visual scripting system. They are deeply integrated into Unreal Engine and are used by indie developers and AAA studios alike. Many full games have been shipped using Blueprints for a substantial portion of their codebase.

  • Workflow Automation & Interactive Design: The usefulness of node-based logic is not limited to games. It is found in tools for creating interactive installations, automating software tasks, and customizing application behavior. This approach lets users visually configure complex workflows without writing code.

  • Low-Code Testing: An adjacent field is low-code testing automation. Tools in this area often use drag-and-drop interfaces to build test scripts, allowing quality assurance teams to create and manage automated tests visually. This is another example of what is visual scripting enabling non-programmers.

Tips for Developers and Tech Leads

To integrate visual scripting effectively into your workflow, you should follow a few best practices. This ensures you get the benefits without falling into common pitfalls.

Visual scripting tips
  1. Use it for Prototyping and High-Level Logic: It is ideal for quickly testing game mechanics, setting up state machines, or defining UI flows. Use it when non-coders need to contribute to the logic.

  2. Avoid Over-Reliance: For systems that require high performance or are algorithmically complex, transition to traditional, text-based code. Use the visual script as a scaffold, then rewrite critical parts in C# or C++.

  3. Keep Graphs Small and Modular: Just as you would write short, single-responsibility functions in code, you should create small, focused visual graphs. Use subgraphs to encapsulate and reuse logic, preventing your main graphs from becoming unmanageable.

  4. Tackle Complex Problems with Community Knowledge: When faced with a tricky bug or a complex implementation in either visual scripts or traditional code, it is common to get stuck. Before modern automated tools became prevalent, developers relied heavily on community-driven platforms. Websites like Stack Overflow, engine-specific forums, and official documentation are invaluable resources. Searching for similar problems or posting a well-defined question can provide solutions and insights from experienced peers, helping you overcome hurdles without reinventing the wheel.

  5. Establish Clear Conventions: Your team should agree on standards for naming, layout, and commenting within visual graphs. This discipline is crucial for keeping your visual codebase clean and maintainable. This approach helps in understanding what is visual scripting at a team-wide scale.

Conclusion

Visual scripting is an approachable, visual layer that sits on top of programming logic. It demystifies the process of creating behavior in software, making it accessible to a wider range of creators. Its strengths in rapid prototyping, team collaboration, and design-centered development are clear. For many, this is the complete answer to what is visual scripting.

However, it is not a replacement for text-based coding. According to Gartner, the market for low-code technologies is expanding rapidly, showing its importance. The best results come when it is used judiciously as part of a complete toolset, complementing traditional code rather than supplanting it.

The true value of visual scripting is proven through application, not theory.  Challenge your team to build its next prototype using Unity Visual Scripting or Unreal Blueprints. The immediate improvement in development speed and workflow will speak for itself.

FAQ Section

1. What is visual scripting used for?

It is used to generate game logic, UI flows, interactive scenes, and prototypes. It is also applied in automation tools and workflow setups. It is particularly useful when you want to build logic visually or involve non-coders in the development process. This is the practical side of what is visual scripting.

2. Is visual scripting easier than coding?

It is often easier for simple logic because it hides syntax and lets you connect concepts visually. However, for complex or large-scale systems, traditional coding provides more control, clarity, and better tools for maintenance and refactoring.

3. Can you make a game with visual scripting?

Absolutely. Many prototypes and indie projects are built entirely with tools like Unity Visual Scripting or Unreal Blueprints. That said, most complex, commercially released games use a combination of visual scripting and traditional code to achieve their performance and scalability goals.

4. Was Hollow Knight made with visual scripting?

No available evidence suggests that Hollow Knight used a visual scripting system. It was built in Unity using traditional coding techniques. The game is a great example of what can be accomplished with a powerful engine and a well-structured C# codebase.

Figma & No-code

Shivam Agarwal